A home food dehydrator (aka dryer) is an electrical appliance purpose-made to dry foods indoors in order to preserve them. All models will have a heater, a fan to move the heat around and create an air flow, and trays on which the food to be dried is arranged. The appliances provide semi-sealed environments inside, with just enough vents to allow the required dry air to flow in, and for moist air to flow out.
So Easy to Preserve says,
A food dehydrator is a small electrical appliance for drying foods indoors. A food dehydrator has an electric element for heat and a fan and vents for air circulation. Dehydrators are efficiently designed to dry foods fast..” [1]Andress, Elizabeth L. and Judy A. Harrison. So Easy to Preserve. University of Georgia Cooperative Extension. Bulletin 989. Sixth Edition. 2014. Page 333.
A dedicated electric food dehydrator is the method of home food drying most recommended by all reputable home food preservation sources.
Note: This page is about dedicated, purpose-built electric food dehydrators. Follow this link for alternative methods of food dehydration.
Note: even though what we do at home is technically food drying, rather than dehydration (which gets out even more water than home drying does), the machines are still referred to as “dehydrators” rather than “dryers.”
- 1 Initial dehydrator worries
- 2 Other uses for food dehydrators
- 3 Two different types of home food dehydrators
- 4 Stackable tray food dehydrators
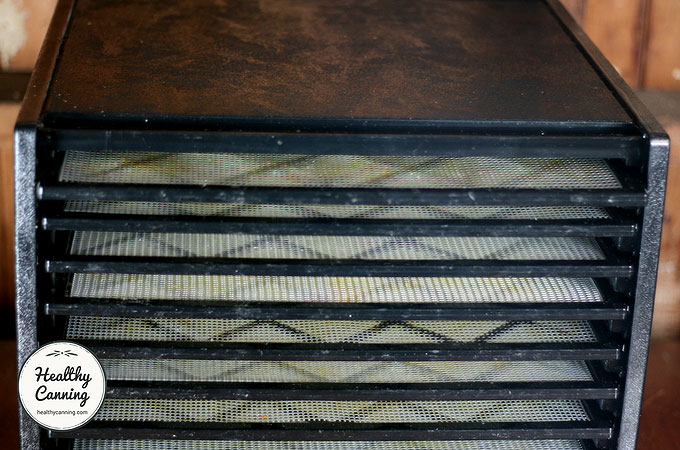
- 5 Sliding tray food dehydrators
- 6 Evaluating a potential food dehydrator purchase
- 7 Fan
- 8 How important is a timer
- 9 How important is temperature control on food dehydrators
- 10 Mesh sheets
- 11 Parchment sheets
- 12 Cooks Illustrated Dehydrator Choices
- 13 Excalibur 9-tray dehydrator: misc photos
- 14 Excalibur 9-tray dehydrator: misc notes
- 15 Cost of running a food dehydrator
- 16 Dehydrator versus air conditioner
- 17 Further reading
Initial dehydrator worries
When you are agonizing over whether to buy a food dehydrator, you wonder:
- if you will do do enough food dehydrating to justify getting one in the first place;
- if you will find enough ways to use the produce that you dry;
- if the “audience” that you feed is going to like any of it;
- if you should get a “just okay” starter model, or spend a bit more and get one that seems like it would keep you happier, longer;
- if it will cost a lot to run and drive up your electricity bills;
- if it is going to be one of those “single use” appliances that end up gathering dust at the back of the cupboards.
Some of those points you’ll have to think about yourself and perhaps only time will tell. Others, with any luck this page will help you with.
Note: when you research dehydrators, you are going to be taken aback to learn that many models are going to come without two things that you will probably consider basic — a timer and a temperature control. You’ll have to learn to live with the feeling that you’re being taken for a ride (you’re not alone, we all went through that) and have to swallow the fact that if you want those basics, they are just going to cost you more.
Other uses for food dehydrators
Food dehydrators actually can be multi-use appliances to help pay their way.
We’re sold on a dehydrator for rising bread in a reasonable time on those cold days when the dough just does not want to rise in a hurry or at all. (Do make the effort, though, to always put a small pan of water in along with the pan of bread dough to help stop the dough from drying out, even if you have covered the bread pan.)
Two different types of home food dehydrators
Home food dehydrators come primarily in two types: stackable tray, vs sliding tray.
Cooks Illustrated says,
Food dehydrators come in two styles—large boxes with trays that slide in and out like oven racks, and those composed of round [Ed: some are square], stackable trays that seal together and are capped by a lid… both styles work on the same general principle: A heating element warms the air, and a fan (located in the back of sliding-shelf models and at the top or bottom of stacking-shelf ones) blows it across the trays, carrying moisture away from the food and sending it out through vents.” [2]Cooks Illustrated. Food Dehydrators. September 2016. https://www.cooksillustrated.com/equipment_reviews/1709-food-dehydrators. Accessed January 2018.
Stackable tray food dehydrators
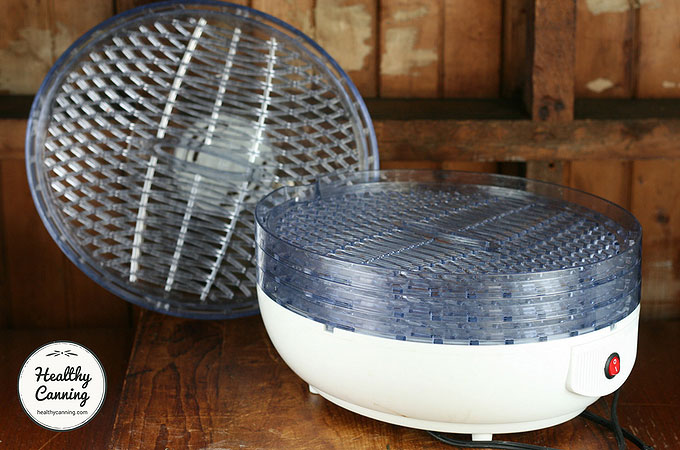
Stackable tray food dehydrators will have the heating element and fan either in the base, or, in the lid. The stackable trays are sometimes referred to as “nesting trays.” (To be clear, it’s the trays that are stackable: not the actual machines themselves as a whole.)
Advantages
- Usually less expensive to purchase;
- Can be stored away in sections, which could be useful where storage space is catch as catch can;
- Many models are expandable by buying more trays to stack up. “Some models are expandable and additional trays can be purchased later”. [3]So Easy to Preserve. Page 333. Note, though, that if you expand beyond the wattage drying capacity of the machine, the drying capacity can be diminished and some food may spoil instead of drying. Preserve It Naturally says, “70 watts per tray is considered sufficient. Insufficient wattage can lead to spoilage during dehydration.” [4]Excalibur. Preserve It Naturally. Sacramento, California. 4th edition, 2012. Page 9.
Disadvantages
- Absolutely must rotate trays top to bottom frequently for even drying;
- Liquids can drip down into bottom heating elements / fans;
- Heated air can pass through trays of different foods, mixing flavours;
- Trays must be precisely locked together flush to prevent gaps in outside seal at the sides that hot air could escape out of instead of following its intended vertical path. Any slightly thicker food chunks can impede the trays resting on each other properly, also impeding this exterior seal;
- Less usable shelf space as most trays must have large central cavities in them to allow heat current to pass through. Cooks Illustrated says, “Stacking-shelf machines had doughnut-shaped trays with holes in the middle for air flow, so their usable surface was no greater than 5 inches (12 cm) from the center to the outer edge.” [5]Cooks Illustrated. Food Dehydrators. September 2016.
- Cooks Illustrated says that checking on the progress of the food being dried in stacking machines can be just a bit tricky: “Stacking-shelf machines were trickier [than sliding tray machines]. Their motors are located in the top or bottom of the machine: Machines with motors at the bottom could continue whirring away when we lifted off the lid and peeked at each level. But one dehydrator with the motor in its lid posed a challenge. We had to hold it while it ran, delicately place it on the counter, or unplug it and plug it back in (there was no power button) when checking for doneness.” [6]Cooks Illustrated. Food Dehydrators. September 2016.
Preserve It Naturally says,
Bottom [heating] element units tend to be extremely inefficient, the temperature from the lowest to the uppermost drying tray may fluctuate as much as 60 F (16 C) to 80 F (27 C.)” [7]Preserve It Naturally. Page 9.
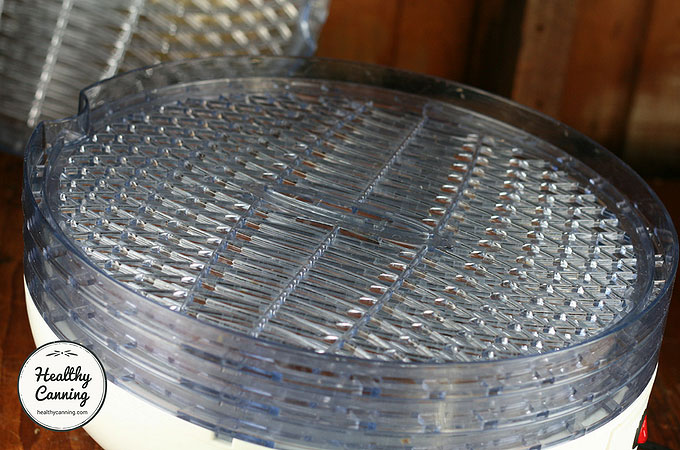
This stackable actually has a relatively small central hole in its trays.
Sliding tray food dehydrators
Advantages
- All trays get equal heat (in theory);
- Reduces flavour mixing when different foods dried at once because air passes over trays, not from one to the other;
- Greater usable shelf space. Cooks Illustrated says, “….sliding-shelf machines had large square or rectangular trays that were at least 11 inches (28 cm) across. They were easy to load and held more food.” [8]Cooks Illustrated. Food Dehydrators. September 2016.
- Can act as proofing boxes for raising bread (stackable tray models cannot.)
Disadvantages
- Usually more expensive to purchase;
- Have solid frames, so you can’t store them away in pieces to save storage space;
- Not expandable.
Note that even though many sliding tray dehydrator makers will tout “no need to rotate trays” as a selling feature over stackable models, most do admit nonetheless that periodically rotating the trays does improve efficiency and reduce trying time.
Evaluating a potential food dehydrator purchase
With an electric food dehydrator, the quality of the dried food it can produce is obviously the most important factor. However, the user experience, matters too.
You will want to consider points such as the following:
- how easy are the trays to lay food out on. Cooks Illustrated noted that arranging produce around large central air holes can seem like a jig-saw puzzle: “Arranging round slices of produce and strips of jerky on these trays sometimes felt like a jigsaw puzzle, and fewer pieces of food fit.” [9]Cooks Illustrated. Food Dehydrators. September 2016.
- how easy is it to place the trays in the machine;
- how easy is it to check on the progress of the food on the trays while drying;
- if you want to avoid handwashing, make sure the trays and mesh overlay grids are dishwasher safe;
- on some models, the space between trays may not be high enough to fit in foods that you want to dry without interfering with the trays sealing at the sides. So you have to squish the trays down and hope for the best, or, hunt for the offending pieces and keep trimming then until the gap will close;
- does the dehydrator come with mesh sheets to lay on the tray, or are they an additional add-on cost (you’ll eventually want such sheets for sure);
- does it come with a good book or just a couple page pamphlet? (Many Excalibur models come with Preserve It Naturally, a 200 page dehydration book respected in its own right.)
Look at the watts that the manufacturer says the machine uses. Preserve It Naturally says if you are trying to determine if a machine has enough wattage, evaluate it against the number of trays. “As a general rule of thumb, 70 watts per tray is considered efficient.” [10]Preserve It Naturally. Page 9. So if there are 5 trays, you will want to see a minimum of 350 watts (70 x 5).
Most people really want the Excalibur sliding tray machines, and are never sorry when they get them. Others settle for or start with Nesco or Presto, either because that is their budget at the time, or because they don’t want to spend more until they know for sure that dehydrating is for them.
Most reviewers forget that Excalibur also makes less expensive stacking models. As of January 2018, they offer seven stackable models, all with temperature control and timers.
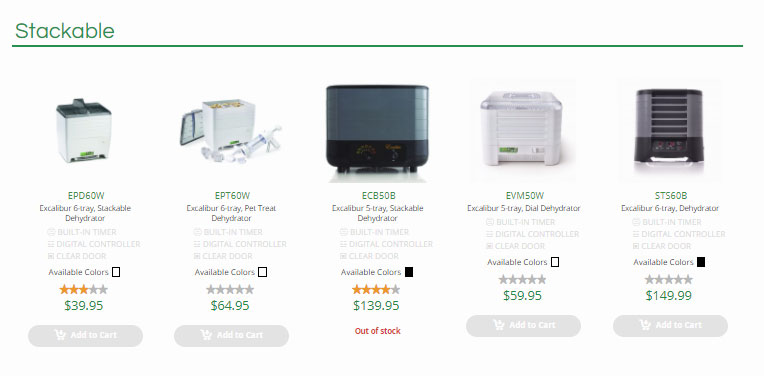
Some of Excalibur’s stackable models at the start of 2018.
Fan
All dehydrators will come with a built-in fan. The fan is designed to move the heat around, and to move out air that has absorbed food moisture and replace it with dry air ready to absorb more moisture.
There are two aspects to consider: fan direction, and noise.
Horizontal fan direction is considered the best, though it only seems to come with the more expensive models.
Preserve It Naturally says,
[An even heat flow to every tray] can best be achieved with a horizontal airflow, one that flows in one side, across the food, and out the other the other side. Horizontal flow reduces flavor mixing and permits even dehydrating without tray rotation. Make sure that the size of the blower or fan is suitable for the internal capacity of the dehydrator, otherwise, the food will ‘cook’ rather than dehydrate. The blower or fan should also be designed for continuous operation.” [11]Preserve It Naturally. Page 11.
The noise factor is harder to put a finger on. There are no dehydrators that we know of with absolutely silent fans. They all create fan noise while running. But, everyone’s definition of “acceptable levels of fan noise” is going to be different.
And, it will depend on whether you are planning to run the dehydrator in a room right next to you where you can hear it, or if you are going to run it in the basement or garage, where you don’t care what noise it makes.
For what it’s worth, the Excalibur sliding-tray models are generally considered “good” as far as quietness of fans go, but they are not silent by any means, and you still probably would not want them sitting right next to you while you are trying to watch TV or talk on the phone.
How quiet a dehydrator is may be a very subjective topic of discussion. We don’t yet know of a dehydrator rating source that has measured the fan noise objectively in decibels.
How important is a timer
It is surprising that with many food dehydrators, a timer is treated as though it is a “luxury add-on”, especially considering how much dehydrators cost and how little there is to them otherwise, but such indeed is the case.
On its sliding tray models, Excalibur charges extra for those with a timer.
On Excalibur sliding tray models, the manual dial timers will go up to 26 hours. The digital timers will go up to 48 hours.
Trying to operate a dehydrator without a timer severely limits your ability to dry foods overnight. This can be particularly important for those who live where electricity is cheaper during the night. If you have onions that probably will be done at 3:30 am, you really don’t want to have to set your alarm to get up in the middle of the night to turn the machine off. On the other hand, if you let it run till 8:00 AM when you get up, they may be burnt to a crisp. Having a timer that will turn the machine off for you is clearly ideal, and no one would say no to one if they were given one.
If you have a model that doesn’t have a timer, many people suggest simply going to a local hardware store, buying a lamp timer, plugging your dehydrator into the timer, and letting the timer control the machine.
How important is temperature control on food dehydrators
Some dehydrators come with no temperature control — just an on / off switch. Some come with a “low / medium / high / setting.” Others come with a control, either a manual dial gauge or a digital control, to allow you to set a wide range of temperatures within the ranges recommended for drying produce.
Preserve It Naturally carries the following advice,
Some form of temperature control is needed to regulate the heat source; avoid units without one. Such a control promotes consistent, even results. The control may be integrated into the dehydrator or a conventional thermostat.
The best controls are completely adjustable. Controls geared to just ‘low-medium-high’ heats are inadequate. As in regular cooking, different foods require distinctly different processing temperatures. For instance, meats require a fairly constant temperature of 155 F / 68 C, whereas most herbs must be kept at 95 F / 35 C or they will scorch. A variable temperature range from 85 F / 29 C to 155 F / 68 C is adequate for dehydrating; lower or higher temperatures will either spoil or cook food. … In the event that the control or thermostat fails, the unit should also be equipped to shut off the heat source.” [Ed note: Preserve It Naturally is from Excalibur, all of whose dehydrators do come with temperature controls.) [12]Preserve It Naturally. Page 10.
The Ball Blue Book puts a temperature control in a “nice to have” category:
Some dehydrators come with ‘nice to have’ features like temperature controls and timers. But units without these features work equally well for drying food.” [13]Ball Blue Book. Muncie, Indiana: Healthmark LLC / Jarden Home Brands. Edition 37. 2014. Page 161.
Cornell Cooperative Extension says, “Dehydrators with adjustable thermostats will dry food more effectively and safely than those with only an electric heating coil.” [14]Katherine J. T. Humphrey and Judy L. Price. Drying Foods in New York State. Cornell Cooperative Extension. 2011. Accessed January 2018 at https://blogs.cornell.edu/cceherkimer/files/2009/04/2011_Drying_Foods_in_New_York_State.pdf
If you have a food dehydrator without a temperature control, when you start to really use, it won’t be long before you regret not having a temperature control, because all dehydrating advice from reputable sources will absolutely indicate a preferred temperature to dry the food at, and the estimated drying times will be based on that temperature.
A timer you can always “add on” in the form of a lamp timer, as noted above. But you can’t add on a temperature control.
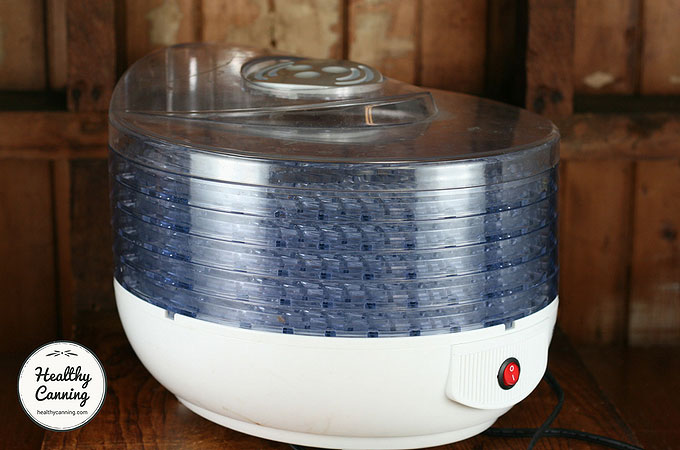
This machine comes with neither a timer nor a temperature control. Only an on / off button.
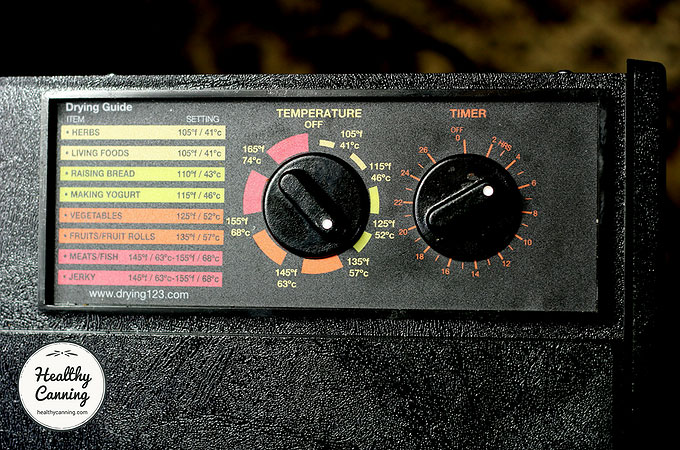
Excalibur temperature control and timer (note: timer not on all Excalibur models)
Note about Excalibur temperature control
The manual dial control ones only go as low as 105 F (see above photo.) The digital ones are advertised as going down to 95 F.
Excalibur’s written advice for herbs is to not go above 95 F.
You don’t seem to have a lot of choice except to go above 95 F on the manual dial control machines.
Our email queries to Excalibur about this went unanswered.
Mesh sheets
You’ll always end up wanting mesh sheets that you can lay overtop the drying trays. They stop small pieces of produce from falling down through the trays. And remember, even large pieces of produce can shrink while drying to be small enough to fall through.
Some less expensive dehydrators may come without, meaning you have to spend more money to buy them. (Check to make sure that you even can.)
Before you buy any dehydrator, make sure replacement mesh sheets are available. And check to see if they are handwash only, or are dishwasher safe.
All mesh sheets may stain over time. That’s fine: you aren’t meant to be hanging these up on your living room walls as art work.
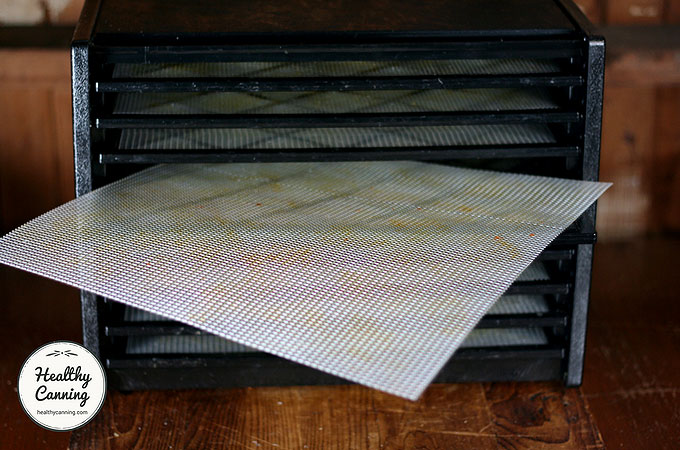
These mesh sheets have stained a bit. A determined cleaning may lighten them some, but some staining may always remain.
Parchment sheets
Parchment sheets are literally that; sheets of parchment. They are solid, and meant for uses such as spreading fruit purée out on in order to make fruit leathers.
For some dehydrator models, you can buy parchment sheets pre-cut to your trays exactly.
A less expensive route is simply to buy a roll of parchment paper and cut your own as needed.
Note: do NOT simply assume that waxed paper will do the trick. Fruit leathers could stick to that horribly and leave you tearing your hair out trying to get them off.
Cooks Illustrated Dehydrator Choices
In 2016, Cooks Illustrated listed its food dehydrator choices in this order, with the best first.
- Excalibur 9 sliding tray with timer;
- Presto Dehydro 6 tray with timer, model 6302
- Aroma Professional 6 tray, no timer, model AFD-815B
- Nesco Snackmaster Pro 5 tray, no timer, model FD-75
They listed a 5th model, the Waring Pro 5 tray, no timer, model DHR30 as “NOT RECOMMENDED.”
Whatever model people end up with, most people seem to like the one they have once they have gotten used to its pros and cons.
Excalibur 9-tray dehydrator: misc photos

The surface area on the machine. It looks a bit like those 1980s black pressed wood stereo stands.
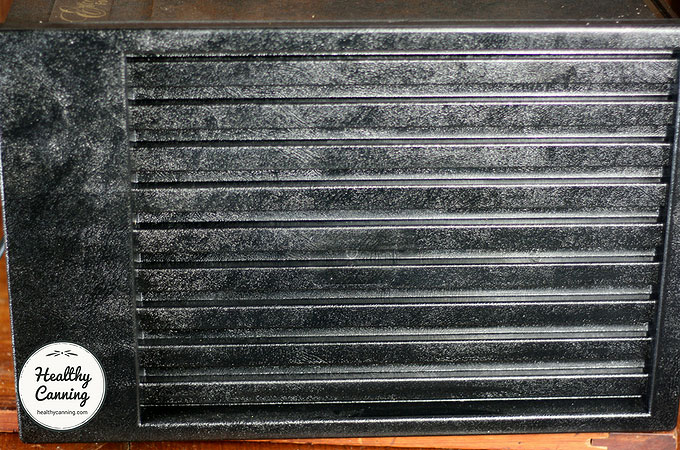
The side of the machine.
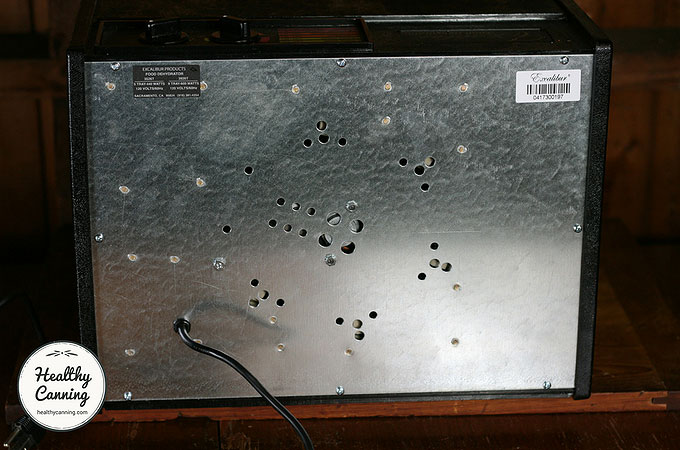
The back of the machine
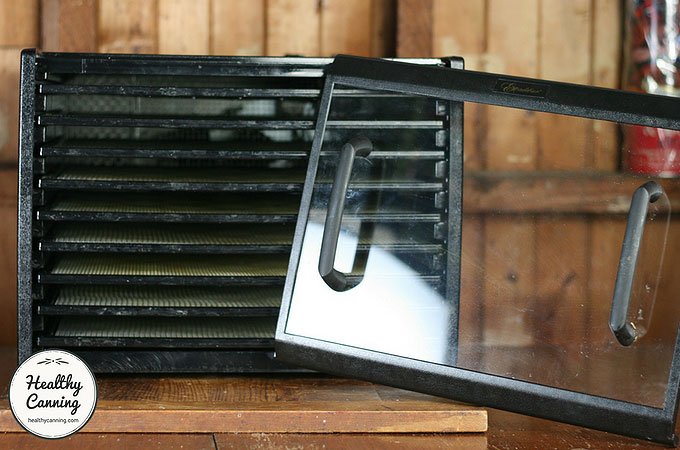
Models come with either a solid door or a glass door.
Excalibur 9-tray dehydrator: misc notes
(These notes would also apply to their 5 sliding tray model.)
The manual dial timer on an Excalibur is very stiff to move. At first you may think you’ve got a dud and it’s just plain stuck. But it’s one of those timers that you really have to put some elbow grease into turning. It is not one of those timers where if you force it, you break it.
The temperature control by contrast will move easily.
These models have a thermostat, so the heating element is not running constantly. The thermostat turns it off and on as needed to maintain the desired temperature inside the machine, which is an energy saving feature.
The fan on Excalibur’s sliding tray models is at the back. The air flows from the back of the machine to the front, and out the side gaps of the front door.
The door hangs loosely on the front of the machine. You drape a lip that runs along the top of the door over the edge of the front of the machine, and then just gently let the bottom of the door fall down into place. The sides of the door will have gaps: that’s on purpose, to let the moist air out. To open the door, hold it by its handles and, tilting it up from the bottom, just raise it up into the air. It probably sounds all very complicated when described in writing, but it’s easy when you actually have it in your hands.
A glass door may seem desirable, but it’s perhaps really only useful to look in and remind yourself how many trays you are running. You can’t really get a look in along the depth of the trays owing to the little space between them (unless you are running 1 or 2 trays and have spaced them out.) So it might not worth paying a lot extra for a glass door. And it is one more thing in the house to wipe smudges off. Still, given the choice of being able to at least see in, or not, most people would probably opt to be able to look in. The glass door may mist up in the first hour or two of drying but that will clear up.
When rising bread in it, put just one tray in, in the bottom rung. Follow their advice and both cover the bread pan with a light cloth, and put in alongside it a small pan of heated water. If you skip the water, your dough will crust on the top and not rise properly. You may find their suggested dough rising setting of 110 F / 43 C a bit high and want to go a few degrees lower. You’ll know after trial and error.
Cost of running a food dehydrator
The Ball Blue Book says, “Inexpensive dehydrators may not operate efficiently, resulting in greater energy costs than the actual savings of preserving foods by dehydration.” [15]Ball Blue Book. Edition 37. Page 162.
You’ll want to look at reviews to see how well heat is transferred between trays: less efficient heat movement can mean some trays aren’t done when others are, requiring you to keep on running the machine for those trays that aren’t done.
Another good way to evaluate energy efficiency is to calculate the cost per hour of running your machine. It may seem complex at first blush, but stick with it, it’s actually very easy.
To calculate how much it will cost to run a particular dehydrator per hour, you need the following numbers:
- The wattage of the machine;
- The cost of electricity where you are.
Note: The wattage quoted for your machine is the maximum power that the machine will draw when it’s run at its highest temperature. So we’re actually going to be calculating your highest possible cost per session.
Step 1 energy used per hour
The formula to work out how much energy used per hour is:
Wattage of the machine / 1000
A 9 tray Excalibur uses 600 watts. So it uses 600 watts / 1000 = .6 kWh per hour.
So, the Energy used per hour in kWh = .6 kWh
Step 2 cost of energy per hour
Now take that “Energy used per hour in kWh” (in the above example, it’s .6) and multiply that by the cost of electricity per kWh where you are. Say it’s .11 (cents, or pence in England.) You can find out by looking at your electricity bills or the web site of your electricity provider.
.6 x 0.11 = 0.066 = 0.07 cents or pence an hour (rounded to a realistic number)
That machine will cost .07 cents (or pence in the UK) an hour to run.
Note: if there is time of use electricity where you live and you plan to run the dehydrator at the cheapest cost time, you’ll obviously want to use that cost in your numbers.
Step 3 cost per drying session
You’ve got your cost per hour; now it’s easy to figure out how much it costs to dry a particular product.
Say mushrooms take 7 hours where you are in your humidity conditions.
So 7 hrs x .07 cents / pence (from the cost arrived at above) and your cost for drying those mushrooms is 49 cents (or pence.)
Not so bad eh? Especially if you filled up all 9 trays in your 600 watt 9-sliding-tray model Excalibur.
The whole formula
( Watts / 1000 ) x (kWh cost where you are) x (no. of hours needed)
- For Excalibur 9 sliding tray, that’s : .66 x (kWh cost where you are) x (no. of hours needed)
- For Excalibur 5 sliding tray, that’s : .44 x (kWh cost where you are) x (no. of hours needed)
Excalibur sliding tray model costs
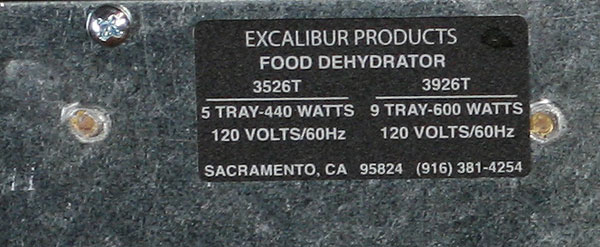
The Excalibur models with 5 sliding trays use 440 watts; the ones with 9 sliding trays use 600 watts.
| Your electricity cost per kWh | 5 sliding tray Excalibur per hr | 9 sliding tray Excalibur per hr |
|---|---|---|
| 0.05 | 0.02 | 0.03 |
| 0.06 | 0.03 | 0.04 |
| 0.07 | 0.03 | 0.04 |
| 0.08 | 0.04 | 0.05 |
| 0.09 | 0.04 | 0.05 |
| 0.10 | 0.04 | 0.06 |
| 0.11 | 0.05 | 0.07 |
| 0.12 | 0.05 | 0.07 |
| 0.13 | 0.06 | 0.08 |
| 0.14 | 0.06 | 0.08 |
| 0.15 | 0.07 | 0.09 |
| 0.16 | 0.07 | 0.10 |
| 0.17 | 0.07 | 0.10 |
| 0.18 | 0.08 | 0.11 |
| 0.19 | 0.08 | 0.11 |
| 0.20 | 0.09 | 0.12 |
| 0.21 | 0.09 | 0.13 |
| 0.22 | 0.10 | 0.13 |
| 0.23 | 0.10 | 0.14 |
| 0.24 | 0.11 | 0.14 |
| 0.25 | 0.11 | 0.15 |
And the energy cost bonus discount….
As we stated at the start, the wattage we are given is based on the machine’s highest temperature. So you’ve just calculated the worst-case, highest-cost scenario. This cost per session will apply if you have a dehydrator without a temperature control. Or, if you have the temperature control set at its highest because you are drying meat products, etc.
In all other scenarios — drying herbs and onions, proofing bread, drying banana or carrot slices, etc, etc — your session costs will actually be lower!
As an added bonus bonus, if you purchased a model with a thermostat, the heating element will not be running constantly anyway. The thermostat will be turning it on when needed to maintain the desired temperature, and then off until needed again. So that’s even less energy cost being incurred! (And perhaps an extra incentive to spend a bit more to get a machine with a thermostat.)
Remember that even with sliding-tray models, rotating the drying trays periodically by a quarter-turn can reduce overall drying time, and thus clearly save you even further energy usage costs.
Dehydrator versus air conditioner
Some people wonder if a food dehydrator heats up a house enough in the summer to force their air conditioner to have to work harder, and suggest that it might be better to run the dehydrator outside.
Others say that if you live somewhere with humid summers, it’s better to run a dehydrator indoors with the air conditioning running, as air conditioners dehumidify the air indoors which will shorten drying times compared to running it outside in the humid air.
All of this is just speculation that we’ve come across here and there, but we haven’t seen any reputable case studies one way or the other. We mention this just to show we have in fact wondered about the topic.
Further reading
Food Dehydrators. Online at National Center for Home Food Preservation. From: Andress, Elizabeth L. and Judy A. Harrison. So Easy to Preserve. University of Georgia Cooperative Extension. Bulletin 989. Sixth Edition. 2014. Page 333.
Cooks Illustrated. Food Dehydrators. September 2016. https://www.cooksillustrated.com/equipment_reviews/1709-food-dehydrators
References


