
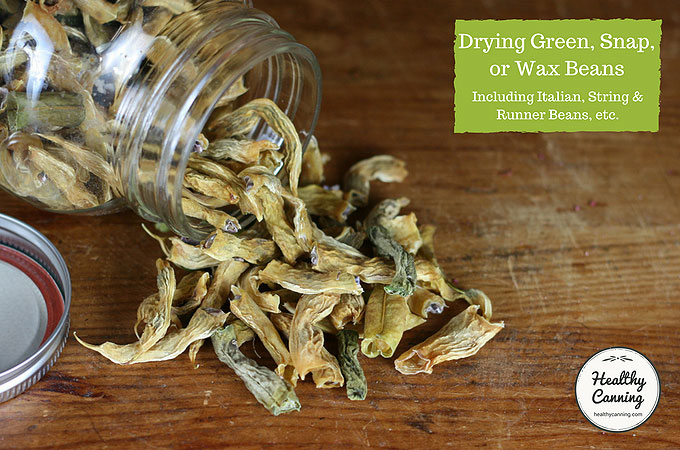
You can dehydrate many of the cultivated long podded-beans meant to be eaten in the pod. Such beans are often treated by cooks as a vegetable rather than a carbohydrate (as are individual, shelled dried beans).
They are known under names such as Green Beans, Italian Beans, Snap Beans, String Beans, Runner Beans, Wax Beans, etc. Pod colours include green, purple, yellow, speckled, etc.
See also: Canning green beans, Canning yellow beans
Yields and Equivalents
20 lbs (9.1 kg) of prepped fresh green beans will dry down to 3 lbs (1.3 kg) [ref]Ball Blue Book, 2014, page 163.[/ref]
1 cup dried = 2 cups rehydrated
Directions
Here we compare directions from three different sources. Note that all either suggest or require a brief freezing period (sic) for the beans after blanching. The reason given is for improved quality of the finished product.
Ball Blue Book
Preparation: “Wash beans, remove strings and cut off ends. Cut beans diagonally into 1 inch (3 cm) pieces or French cut to expose more surface area.”
Blanching: Steam blanch 4 to 6 minutes, then freeze beans 30 minutes to tenderize.
Temperature: 125 F / 52 C
Time: Until brittle.
Notes: “Choose any variety with crisp, thick walls and small seeds.”
Water content: 90 %. (Used if doing a Dehydration Weight Test.)
Reference: Ball Blue Book, 37th edition, 2014. Page 166.
Note: Also in Ball All New, page 338. Similar directions.
Excalibur
Preparation: “Wash beans and remove the pointed ends. Cut into 1” (3 cm) pieces or “French” style. If desired, pretreat by blanching.”
Blanching: “Water blanch 3 to 4 minutes or steam blanch 4 to 6 minutes over water; you may use 1 teaspoon sodium bisulfite per cup (250 ml / 8 oz) water. For a more tender product, freeze the blanched beans for approximately 30 minutes before drying.”
Temperature: 125 F / 52 C
Time: Until brittle.” 8 to 12 hours, depending on humidity in your area.
Quality: Poor
Notes: “Stringless varieties are best for drying, particularly long, plump pods that have a deep green (or yellow for wax) colour and bright appearance. Look for crisp, fleshy walls and small seeds. Good drying beans include Roma, Tendergreen Golden Wax, and Top Crop. Beans strung up to dry look and taste leathery owing to long drying times.”
Reference: Excalibur. Preserve it naturally. 4th edition, 2012. Page 26.
So Easy To Preserve
Preparation: “Wash thoroughly. Cut in short pieces or lengthwise.”
Blanching: Blanch for 2 ½ minutes by steam blanching or 2 minutes by water blanching. “There is an additional step to the process of drying green beans which produces a product more similar to canned green beans. After the green beans have been blanched, place them in a single layer in a freezer for 30 to 40 minutes. Then start the drying process.” (SETP. 6th edition, 2014, page 347.)
Temperature: 140 F / 60 C
Time: 8 to 14 hours.
Quality: Fair to good
Reference: So Easy To Preserve. 6th Edition. 2014. Page 349.
Video from So Easy to Preserve.
Notes
It’s okay if they touch a bit on the trays, as the pieces will shrink away from each other as they dry, but don’t heap them on in layers or overlap.
You can mix types in one batch, for a mixed bean product.
Storage
Let the dehydrated product cool completely to room temperature before packing it into storage containers.
Watch the sealed containers for the first few days for any sign of condensation. If condensation occurs, dehydrate a bit more.
Label jar with name of product and date. Store away from heat and direct light.
Usage notes
To rehydrate:
Cover with cold water and soak 30 to 90 minutes, or cover with boiling water and soak 20 to 60 minutes. After soaking, simmer until tender.” [ref]P. Kendall, P. DiPersio and J. Sofos. Drying Vegetables. Colorado State University Cooperative Extension. Publication no. 9.308. July 2004. Page 2[/ref]
Use in soups, stews, casseroles, composed salads, etc. Some people say like them enough that they will serve them on their own as a side.
Leave a Reply