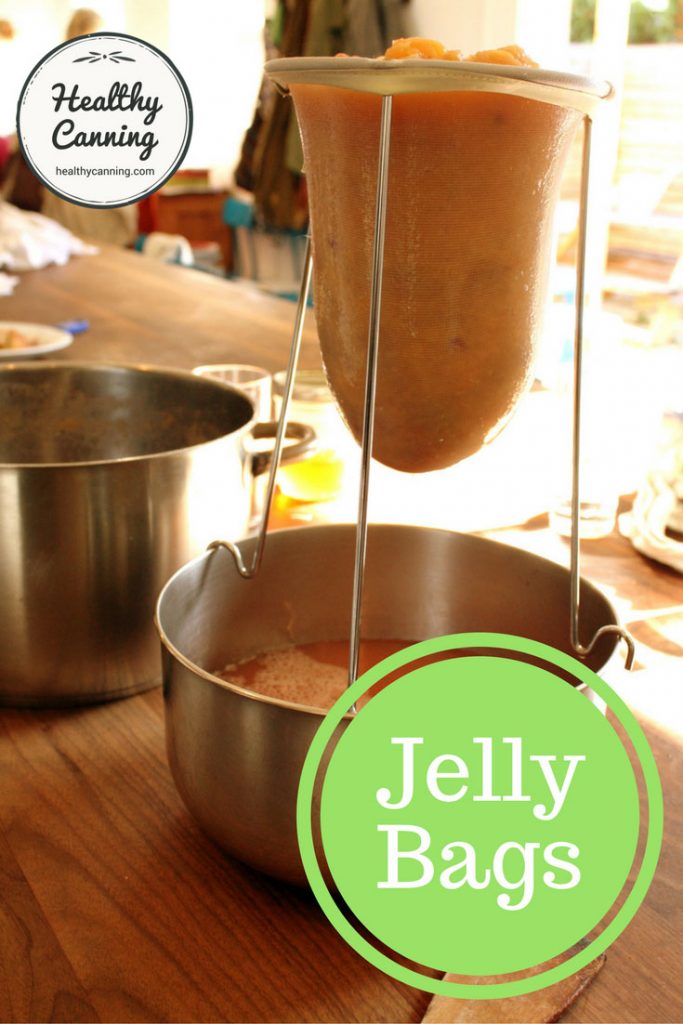
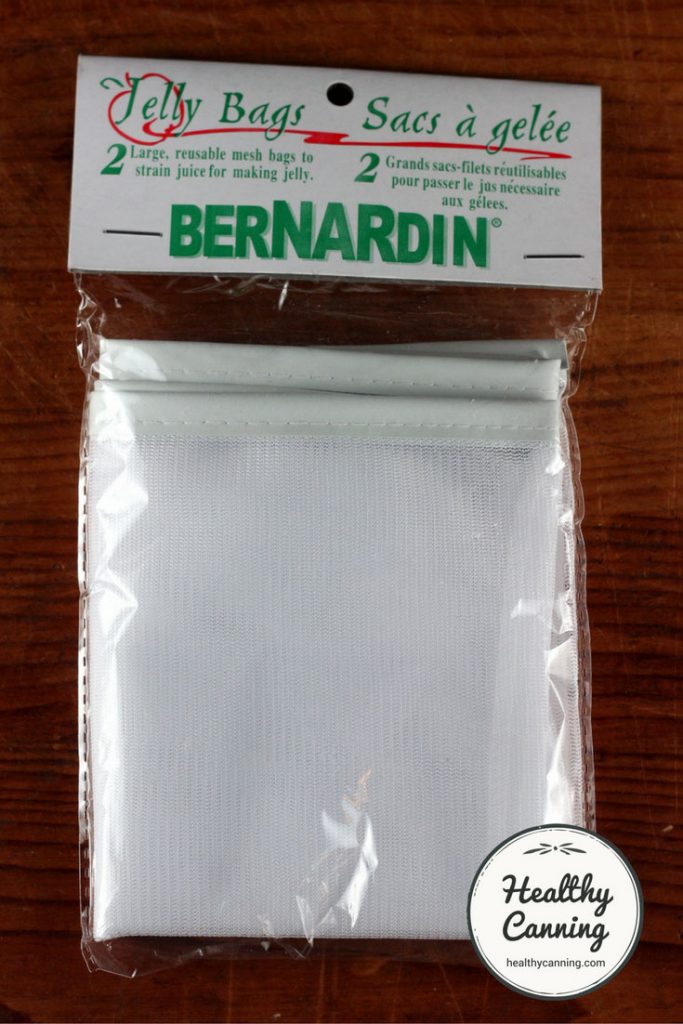
Jelly bags (aka “jelly strainer bags”) are fine mesh bags designed to strain liquid mixtures in order to clarify them into a clear liquid for use in making jellies, or for drinking as a juice.
If your mixture is fruit based, the bag will strain out the pulp, skin and seeds. If your mixture is herb based, it will filter out the stems and leaves, etc.
The bags may be made of nylon or cotton.
A standard North American jelly bag will hold about a maximum of 2 kg / 4 lbs crushed fruit. People often complain that in practice, this isn’t actually a lot.
Some jelly bags will have pointed tips; others will have rounded tips.
Jelly bags can also be used for straining homemade soup stocks, juices for drinking, homemade vinegars and beer, nut milks and for cheese making.
See also: Home-canned jelly
Care of jelly bags
Many people recommend boiling new jelly bags before first use. Boiling them gets lint out, and, some feel, relaxes the fibres.
The bags are meant to be re-used indefinitely. When done using them, you empty their contents into compost, then rinse them right away in cold (not hot) water, then wash them.
The bags are always white to start with, but they will quickly stain. You can bleach a jelly bag if you want to restore the pure white appearance, provided it’s washed well after that. Bear in mind, though, that stains on the bag won’t affect its performance, and probably only you will ever see them.
The nylon ones don’t stain as much as the cotton ones do.
Using a jelly bag
Many people suggest to wet a jelly bag first with water, or some of your prime juice may get taken up by the cloth first thing.
Ellie Topp, in “Preserving Made Easy” advises,
The process can take several hours, but if you first press the fruit pulp through a coarse sieve to remove the larger solids, the resulting liquid will flow through the cloth much more quickly.” [1]Topp, Ellie and Margaret Howard. Preserving made easy. Buffalo, New York: Firefly Books. 2012. Page 60.
This two-step process would in many instances perhaps also have the advantage of avoiding the annoying discovery that your jelly bag is not quite big enough for its contents.
Standard practice is to let a jelly bag drip overnight.
It doesn’t have to be overnight, though. The Ball / Bernardin Complete (2014) advises a minimum of 2 hours:
…..it does take at least 2 hours, as the juice needs to drip undisturbed from the jelly bag…..let drip, undisturbed, for at least 2 hours or overnight to collect juice.” [2]Kingry, Judi and Lauren Devine. Ball / Bernardin Complete Book of Home Preserving. Toronto: Robert Rose. 2015. Page 105-106
Always let it drip, never press or you will press particles through into the juice, defeating the purpose of using the jelly bag in the first place.
If you aren’t happy with the results of the first straining and want to restrain the juice a second time, reheat the juice first for best results (and wash the jelly bag before re-using it.)
If something happens and you don’t have time to actually make the jelly from the juice right then, just freeze the juice for jelly making later.
Propping jelly bags up to drain
Jelly bags are used by suspending them over a vessel to catch the juice that drips out of the bottom of them.
They are suspended in one of two ways usually: (1) by tying them up in the air, or (2) by stretching them over a stand which holds them up.
Ones designed to hang up will come with straps attached with them for the purpose.
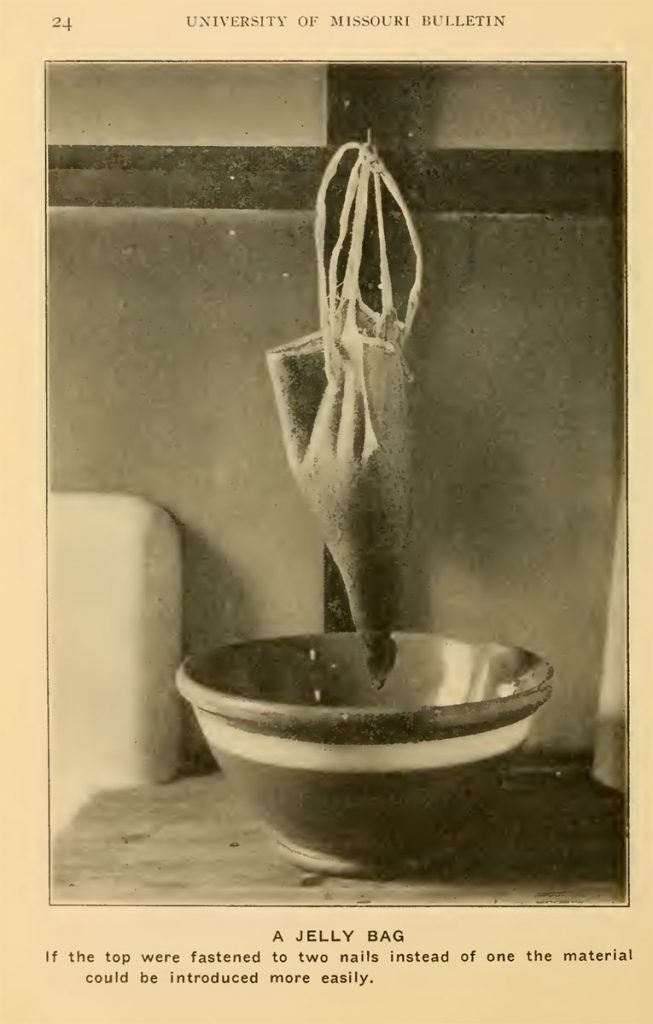
A jelly bag tied up to drip. Src: The preservation of food in the home. 1914. Page 24.
If you do tie it up somewhere to drip, make sure it is tied up securely, because if it falls off in the middle of the night you could wake up to a terrible mess in the morning.
Ones designed to be stretched over stands will have stitched rims at the top.
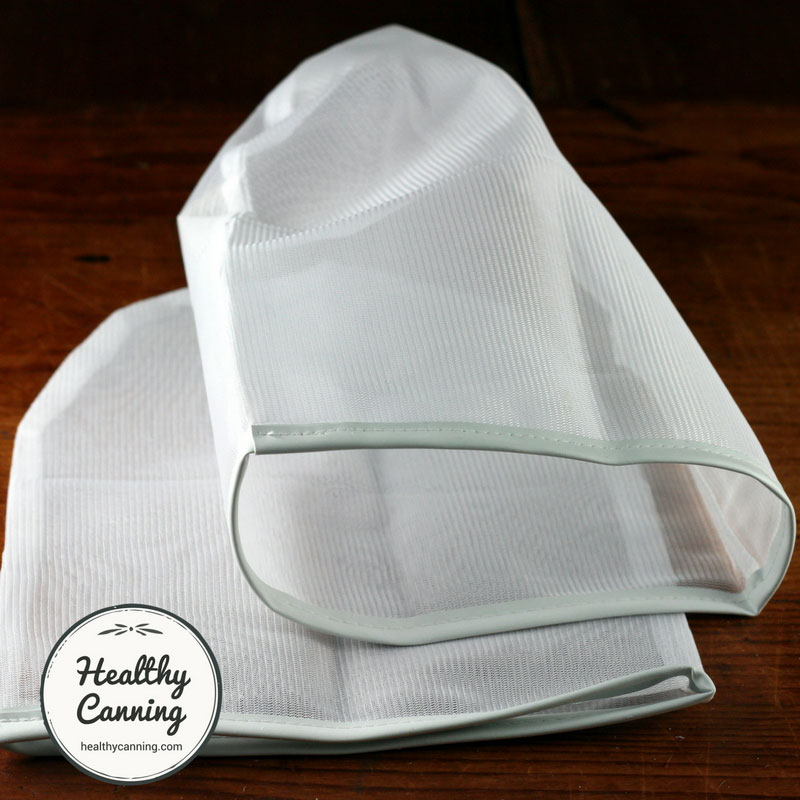
This kind of rimmed jelly bag is designed to be stretched around a stand, They almost look like caps Amish women would wear.
One of the biggest complaints is that the stands are wobbly, and terrify people that they are just going to keel over.
Modern stands commonly sold are thin metal wire or plastic arrangements designed to perch on the rims of a bowl.
Most stands usually come apart for storage but check first before purchasing if this is important to you.
Old-fashioned ones were commonly home-made and, often sturdier.
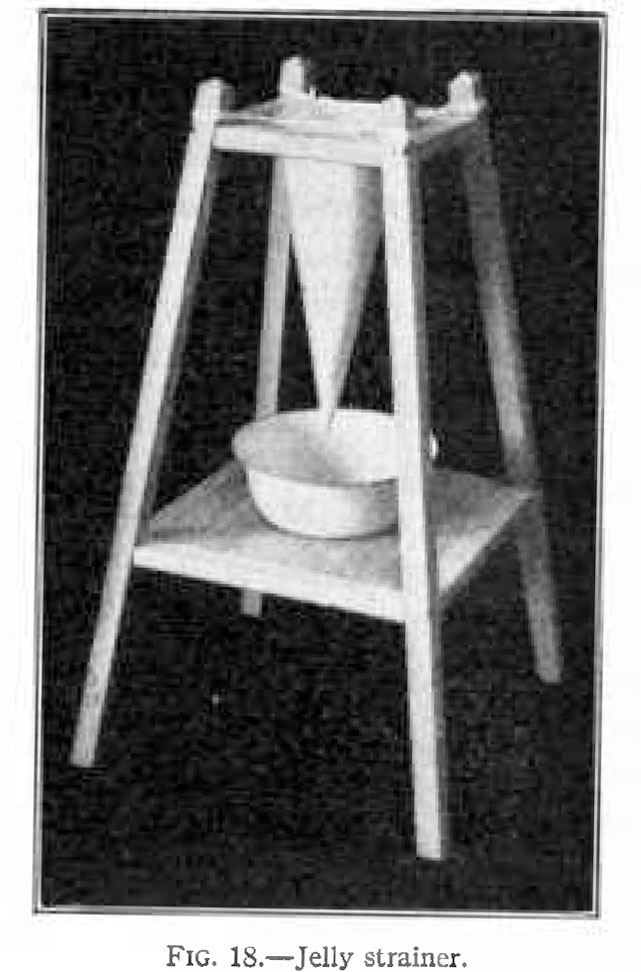
A sturdier, old-fashioned jelly bag stand. (Src: Home canning of fruits and vegetables as taught to canning club members in the southern states. 1918. Page 38.)
Wherever you hang the jelly bag to drip, or stand a jelly bag stand, it just needs to be somewhere out of the reach of kids, dogs and curious cats.
Alternative stand arrangements can also be made.
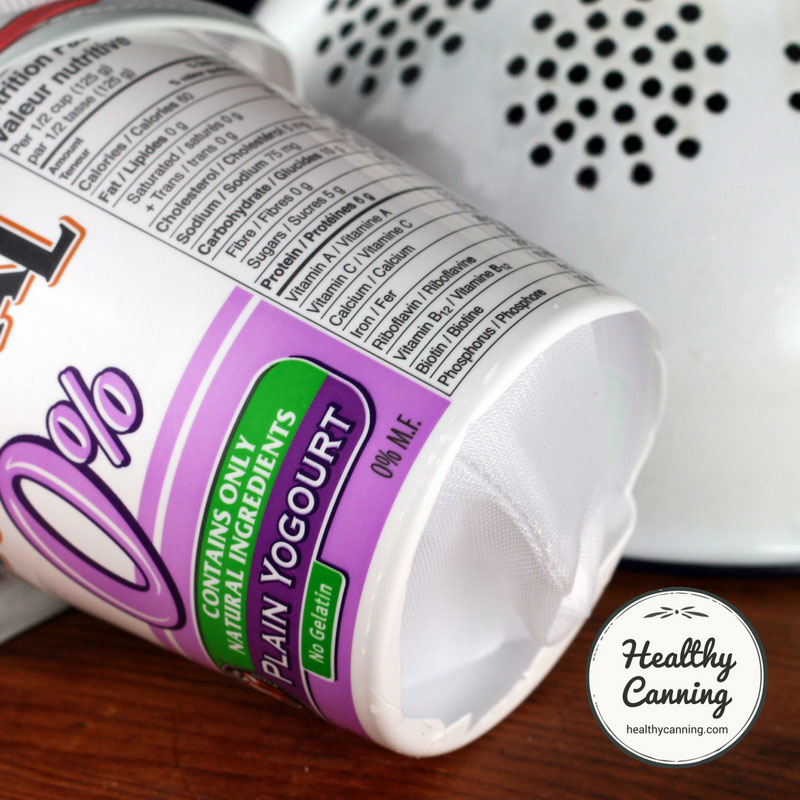
Here’s a sample of a tall yoghurt container with its bottom cut out, to act as a container holding the jelly bag. The container can then be placed inside a blender jug, in a bowl. This makes for a relatively stable arrangement. The jelly bag is secured to the container with a rubber band around the rim.
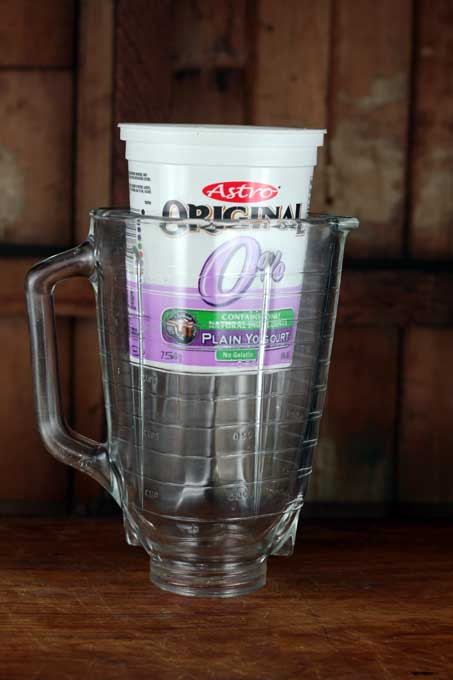
Makeshift jelly bag stand
Do I have to let it drip in the fridge
No reputable source yet has a requirement for the dripping to happen refrigerated. All sources presume that it will happen in open-air, though the longest presumed period is “overnight.”
If fruit-flies or other pests are an issue, you could cover the work area concerned with a layer or two of cheesecloth.
Jelly bag alternatives
A commonly suggested alternative to a jelly bag is cheesecloth. An issue is that most people don’t realize that the cheesecloth sold in most home-canning supply places, such as hardware stores, is actually quite coarse, and you need finer to strain juice. For finer, you’d need to go someplace such as a cheesemaking supplier. So Easy to Preserve (2014, page 200) says to use 4 layers: “Four thicknesses of closely woven cheesecloth may be used.”
Cheesecloth also requires you to fold it over many times to make a thick enough filter, and it’s mostly one-time use, so it gets expensive.
A food mill or strainer will get out seeds and skin, but you still need to strain fine particles of pulp out of the liquid.
A steam juicer can help produce juice that needs less straining, but it still does need some straining to clarify the juice.
Some people suggest coffee filters, but the problem with those is that they clog up very fast — within seconds usually — and all draining ceases.
Many people swear by using cotton (not permapress) muslin lining a colander as a strainer. So Easy to Preserve (2014, page 200), says, “Firm, unbleached muslin or cotton flannel with the napped side turned in can be used.”
Some old hands who do big loads of juice at once will just use a clean pillowcase dedicated to the purpose, and hang it somewhere to drip through. They advise that it’s best to wet the pillowcase first, so that a lot of the precious juice doesn’t get absorbed into dry thirsty cloth, though nylon may absorb less juice than cotton or other fabric.
Do you need a jelly bag
Beginning home canners may avoid getting a jelly bag. Men in particular may try to avoid them the longest.
They will already have acquired a great deal of specialized equipment, and feel this is one thing they can get by without.
It’s really not true, and you can waste a lot of time, resources and ingredients in finding out that whatever substitute you try just isn’t as good as the real thing (with the exception being a pillowcase, which then becomes in effect a large jelly bag.)
Even if you don’t have a sweet tooth and think you will never have any interest in making fruit jellies, you may end up making savoury jellies, or apple juice, or grape juice.
If you find yourself trying to do work-arounds even a few times, then get a jelly bag. They are so inexpensive that it’s not worth the pfaffle of trying to avoid them.
Effectiveness of jelly bags
Jelly bags are very effective at getting suspended particles out of liquid to create a relatively clear juice.
Regardless of how clear a juice you end up with, if you use a pectin for your jelly the clarity can be impeded again somewhat by an added commercial pectin, and particularly by which pectin you use.
Jellies made with Pomona will likely have at least a bit of cloudiness to them, regardless of how carefully you strain the juice first. In compensation, Pomona allows the largest range of jelly-making recipes, and, gives you full control of how much or how little sugar you use.
References

