Rebecca Siegel / wikimedia / 2013 / CC BY 2.0 CC BY 2.0
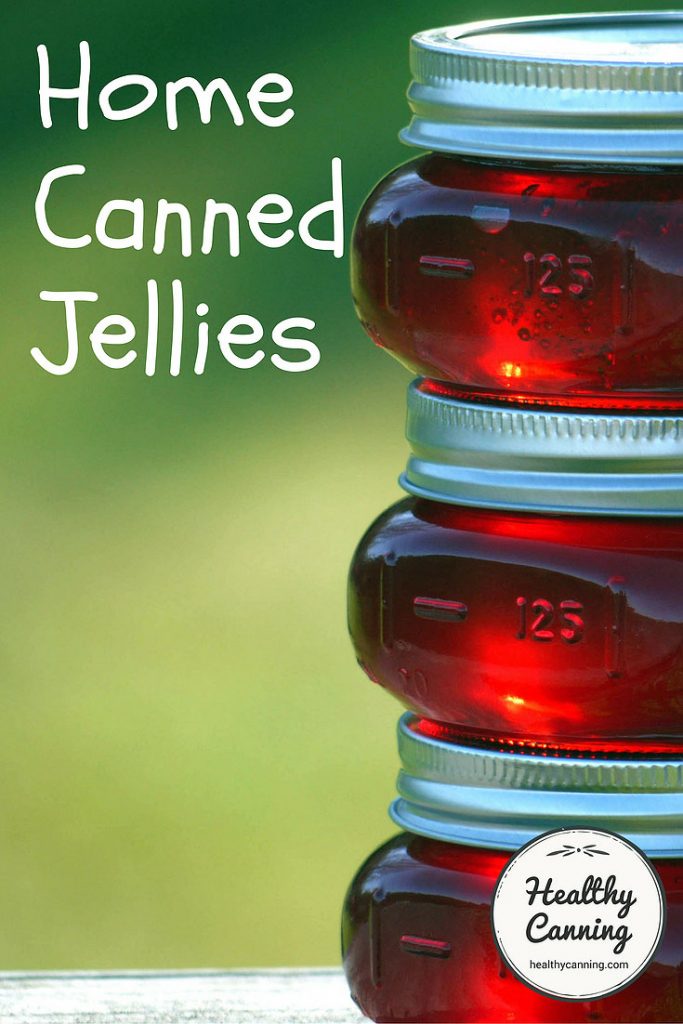
In a home canner’s bag of tricks, jelly was always the pièce de résistance. A canner would be judged on the looks and texture of their jelly — how it shone in the jar when light hit it, and how it quivered on the spoon (or its “wiggle and wobble”, as some put it.)
Jellies have always historically been a sign of “plenty” in a household, as they are a luxury to make in terms of ingredients and time. Modern fruit jellies still involve discarding most of the actual fruit; historical fruit jellies involved first boiling down various ingredients (such as calves’ feet) to create the actual gelatin and then using egg whites, etc., to clarify it.
In any event, with jellies so easily and cheaply bought in supermarkets as of the 20th century, they lost some of their cachet, and now, a home canner is more likely be judged by their salsa.
Jellies are making a bit of a comeback, though jellies are increasingly more likely to be savoury jellies with a splash of alcohol in them and to be reduced or no-sugar, rather than the super-sweet sugar-based, fruit-flavoured jellies of the 20th century. In those terms, they are actually more authentic: jellies were made for centuries without white sugar, which is a relatively recent invention historically and only very recently an affordable one for ordinary households in terms of the grand schemes of food history.
The jelly recipes featured on healthycanning.com can all be made with reduced or no sugar.
- 1 What is jelly?
- 2 Jelly and juice
- 3 Use a big pot
- 4 Testing when a jelly is ready
- 5 Pectin
- 6 How nutritious is jelly?
- 7 Making sugar free jellies
- 8 What makes jellies safe to can
- 9 Getting clear jellies
- 10 What is the shelf-life of home canned jelly
- 11 Do jars of jelly need to be processed
- 12 Jelly in-depth learning resources
What is jelly?
In home-canning terms, a jelly is a gelled product, usually based on fruit juice, though it can also be based on other liquid infusions such as one made from herbs, etc.
It is usually sweetened, though savoury ones may have less sweetener or have their sweetness masked to some extent by other tastes.
Here is how the home preserving book, So Easy to Preserve, defines jellies:
Jellies are usually made by cooking fruit juice with sugar. (Some are made without cooking using special uncooked jelly recipes.) A good product will be clear or translucent (depending on the type of juice), free from sediment, pulp or crystals. It should be firm enough to hold its shape when turned out of the container, but should quiver when the container is moved. When cut, it should be tender yet retain the angle of the cut. Jelly should have a flavorful fresh fruity taste that is not too tart and not too sweet.” [ref]Andress, Elizabeth L. and Judy A. Harrison. So Easy to Preserve. University of Georgia Cooperative Extension. Bulletin 989. Sixth Edition. 2014. Page 197.[/ref]
Many people think of jelly making as easy, and with the best of intentions recommend it to beginners, along with pickles.
Old-hands, however, know those two items are in fact perhaps the hardest things to home-can successfully in terms of a quality end product, and are like boiling eggs: while a few people immediately have a “knack” for it, the rest of us have to try to fail better and better each time. Jelly making in particular can be as persnickety as baking fine French patisseries. There are many ways in which it can rebel and fail on you.
If a jelly fails to gel on you, remember you can always pass it off as a fancy homemade glaze or syrup, and they’ll be none-the-wiser.
Jelly and juice
Modern jellies are based on juice (older jellies are actually based on actual gelatin.)
Some people don’t like making jelly because they see it as wasteful of expensive fruit, because you extract the juice, and throw away the actual fruit. Instead of discarding the pulp, though, you could freeze and use later in baking, or in jams.
So Easy to Preserve says you can just buy the juice already made, and that may be more economical especially out of peak season:
Canned or frozen fruit or fruit juice can be used to make jellied products. If you use commercially canned for frozen products, select those that have no added sugar… It’s best if canned fruits are canned in their own juice. Because commercial canned or frozen products are made from fully ripe fruit (which are lower in pectin than under-ripe fruit), pectin must be added.” [ref]Ibid., page 198[/ref]
If you do make your own juice from scratch, and do it often enough, you will want eventually to treat yourself to a jelly strainer bag. They are inexpensive.
Often you will end up short of the quantity of juice you need to start with.
Pomona’s Pectin gives this advice on how to get more juice:
Where’s the Juice? What do you do if your jelly bag is done dripping but you don’t have enough juice? Slowly pour extra hot water — a very small amount at a time — onto the fruit pulp in the jelly bag, making sure it mixes with the fruit and drips out slowly, until you have the quantity of juice needed. Alternatively, you can dump the fruit pulp back in the pot with some extra water, cook for a few minutes,, and then return the fruit to the jelly bag or cheesecloth to continue dripping until you have enough juice.” [ref]Duffy, Allison Carroll. Preserving with Pomona’s Pectin. Beverly, MA: Fair Winds Press. 2013. Page 89.[/ref]
The authors of the Ball / Bernardin Complete Book (2015) have this suggestion for insufficient juice:
If the yield of juice is slightly less than the quantity required for the recipe, add ½ cup (125 ml) boiling water to the remaining fruit pup to extract additional juice. Alternatively, .. unsweetened apple or white grape juice may be added to homemade juice to extend the quantity.” [ref]Kingry, Judi and Lauren Devine. Ball / Bernardin Complete Book of Home Preserving. Toronto: Robert Rose. 2015. Page 105 [/ref]
When you are preparing the fruit to make juice from it, you don’t need to do all the prep for it that you would for jam, as all the solids will be strained out, anyway:
The stems and pits of cherries and berries need not be removed: the jelly bag will take care of them when the pulp is strained.” [ref] Hertzberg, Ruth; Greene, Janet; Vaughan, Beatrice (2010-05-25). Putting Food By: Fifth Edition (p. 283). Penguin Publishing Group. Kindle Edition. [/ref]
The assumption there is, of course, that you are going to discard the pulp. An exception would be if you want to save the fruit pulp for another use.
Freezing some berries can get them to release their juice. The Ball / Bernardin Complete says,
Freezing raspberries and strawberries helps release their juices, as it weakens their tender cell structure. For berries that are very juicy, tender and plump, such as raspberries and strawberries, freezing can replace heating as a juice extraction method. Freeze unsweetened strawberries or raspberries for at least 24 hours. Thaw in refrigerator and thoroughly crush berries with a potato masher. Pour crushed mixture into a dampened jelly bag [and let drip, undistrubed, for at least 2 hours or overnight to collect juice.” [ref]Kingry, Judi and Lauren Devine. Ball / Bernardin Complete Book of Home Preserving. Toronto: Robert Rose. 2015. Page 106 [/ref]
Note that because you only use the juice of fruits, and leave out the bulk / pulp of the fruit, the yield in jars of jelly tends to be about half the jars that you would have got had you made jam instead.
Use a big pot
You need to use a far, far larger pot for jellies than you would think.
So Easy To Preserve (2014, page 200) says,
A large saucepot is essential as jellies and jams have a tendency to boil over. An 8-or 10-quart [litre] saucepot with a broad flat bottom is recommended. A heavy metal container is best because it allow even heat distribution.”
The Ball / Bernardin Complete Book says,
For best results when cooking jelly, use a heavy-bottomed stainless steel saucepan that is at least three times deeper than the level of the recipe’s juice and sugar combined. Jelly bubbles and boils up when it reaches a full rolling boil and therefore requires this extra pan depth.” [ref]Kingry, Judi and Lauren Devine. Ball / Bernardin Complete Book of Home Preserving. Toronto: Robert Rose. 2015. Page 117.[/ref]
So Easy to Preserve adds this note,
When cooking jelly remember that it should be boiled rapidly, not simmered.” [ref]SETP, page 205.[/ref]
Testing when a jelly is ready
You can test when a jelly mixture has boiled long enough by temperature test, or, by a visual test known as the sheet or spoon test. This kind of testing generally applies to people doing jellies without added pectin.
The Putting Food By authors write,
Jelly at High Altitude: The Sheet Test is likely to be especially helpful if you live at 3500 ft/1067 m or more, because, since jelly boils at a lower temperature than it would in the sea-level zone, the result of the boiling is the important thing—not what the temperature was that brought it to the point of sheeting.” [ref] Hertzberg, Ruth; Greene, Janet; Vaughan, Beatrice (2010-05-25). Putting Food By: Fifth Edition (pp. 285-286). Penguin Publishing Group. Kindle Edition. [/ref]
See the National Center for Home Food Preservation for a table of temperatures that no added-pectin jellies need to reach (in Fahrenheit only; you may need to convert if your thermometer doesn’t have the older Fahrenheit measurements on it.)
The Ball / Bernardin Complete Book has this handy reminder,
Remember to remove pan from heat when performing the sheet test or refrigerator test.” [ref]Kingry, Judi and Lauren Devine. Ball / Bernardin Complete Book of Home Preserving. Toronto: Robert Rose. 2015. Page 120.[/ref]
Pectin
Jelly is lower in pectin than other types of fruit preserves, because the pulp is strained out of it, removing a lot of the pectin. Jellies made with no added pectin therefore can be a trickier: it can be easier to damage their jelling abilities through either over-cooking or over-processing.
However, jellies without added pectin may be clearer. It might be difficult always to obtain complete clarity when you add commercial pectin.
So Easy to Preserve advises,
Be sure to follow the manufacturer’s directions or tested recipes when using commercial pectin. The powered and liquid forms are not interchangeable in recipes. Commercial pectins may be used with any fruit. Many consumers prefer the added pectin method for making jellied fruit products because: 1) fully ripe fruit can be used, 2) cooking time is shorter and is set so there is no question when the product is done, and 3) the yield from a given amount of fruit is greater. However, because more sugar is used, the natural fruit flavour may be masked…. There are special pectins available to use for making jellied products with no added sugar or with less sugar than regular recipes. Specific recipes will be found on the package inserts,and directions should be followed carefully.” [ref]Andress, Elizabeth L. and Judy A. Harrison. So Easy to Preserve. University of Georgia Cooperative Extension. Bulletin 989. Sixth Edition. 2014. Page 199.[/ref]
How nutritious is jelly?
Victorian jellies, made from scratch with boiled calves hooves, may actually have been nutritious, but sadly, the same can’t be said of modern jellies that are sugar based.
They are not actually a fruit product; they are a sugar product, in which fruit juice has been used to add flavour and colour.
The all-important fibre from the fruit has been strained out, leaving just the sugars from the fruit. Remember, modern nutritionists don’t want you drinking fruit juice anymore, even unsweetened: they want you eating the whole fruit, for the fibre.
To this naturally-sweet juice with its own sugars is added a great deal more sweetener in the form of refined white sugar, almost always in volume quantities greater than the fruit juice.
Any vitamin C that was present is destroyed by the boiling before the jelly is even put into a bottle.
The much vaunted fruit jelly of the home canning world is, in effect, candy.
Making sugar free jellies
It is possible to make sugar-free jellies now, using the commercial no-sugar needed pectin products such as those from Ball, Bernardin, Pomona, etc. Some people feel that the reduced or sugar free jellies taste more like fruit, and have less of the harsh taste of refined white sugar.
Use only recipes that are based on those sugar-free pectins, however. The authors of So Easy to Preserve write:
Sugar is an important ingredient in jellied fruit products. It must be present in the proper proportion with pectin and acid to make a good gel. Sugar is the preservative for the product, preventing the growth of micro organisms. It also contributes to the taste of the product. Never cut down on the amount of sugar a recipe calls for unless syrup is the desired end result. Granulated white sugar is usually used in homemade jellied fruit products. Sweeteners such as brown sugar, sorgham and molasses are not recommended since their flavour overpowers the fruit flavour and their sweetness varies. Light corn syrup or light, mild honey can be used to replace part, but not all, of the sugar. For best results, use tested recipes that specify honey or syrup. Artificial sweeteners cannot be be substituted for sugar in regular recipes because the sugar is needed for gel formation…. There are special pectins available to use for making jellied products with no added sugar or with less sugar than recipe recipes. Specific recipes will be found on the package inserts, and directions should be followed carefully.” [ref]SETP, page 199 – 200[/ref]
Pomona has many reduced or sugar-free recipes in its book Preserving with Pomona’s Pectin, as well as on its web site’s jelly section.
Making sugar-free jellies enables you to dramatically reduce the calories in jelly and gets more hidden sugar out of your daily diet.
What makes jellies safe to can
It is rare that sugar will be the safety factor in a jelly, though it will be in two or three low-acid jellies where reduced water activity is the safety mechanism.
Instead, the key safety factor for jellies is the pH: how acidic the jelly is. There was an outbreak of botulism a few years ago in Vancouver, Canada, from home-canned Watermelon Jelly. The jelly had lots of sugar in it, but botulism was able to take hold in the jelly because the watermelon juice used was not acidic enough on its own.
If the liquid a jelly is based on is low in acid (a pH of 4.6 or lower), either because it is from low or border low-acid food items such as watermelon, Asian pears, tomato, red pepper, etc, or because it is an infusion based on herbs, etc, then a safe, tested recipe from a reputable source will always have you add acid in the form of apple or lemon juice, vinegar, etc. Keeping the acidity high in a jelly prevents botulism spores from germinating.
Getting clear jellies
There is no question that traditionally, a jelly has always been judged by how clear and jewel-like it appears in the jar.
When you make traditional jellies with lots of added sugar, with or without the traditional pectins that require sugar, your chances are good of getting a clear jelly.
It can get a bit trickier when you try to make reduced-sugar or sugar-free jellies because (a) you absolutely do always need pectin; and (b) the nature of no sugar needed pectins.
Many people who use Pomona pectin report that you won’t get a clear, jewel-like jelly when you use it.
Some people advise that if clarity is important to you, to try the Ball no-sugar flex pectin because, they feel, it turns out a clearer jelly than the Pomona does.
Other people say that they don’t make a lot of jelly where they care that much about absolute clarity, and appreciate the wider range of recipes allowed by Pomona.
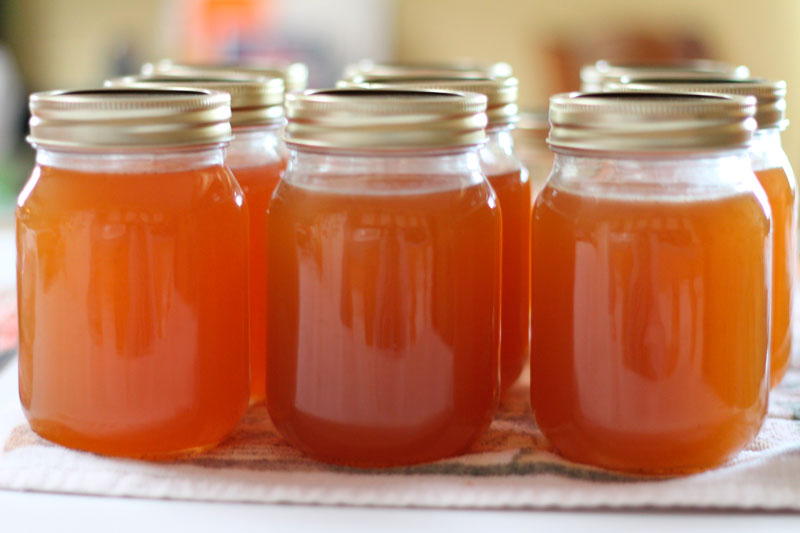
A less-clear peach jelly. Homemaker/ Pixabay.com / 2014 / CC0 1.0
What is the shelf-life of home canned jelly
Normally, the USDA advises that in general, home canned goods have at least a year of shelf life during which consumers can expect optimum quality.
So Easy to Preserve, however, advises a shorter shelf life for jellies for best quality:
To have jellied fruit products at their best, make up only the quantity that can be used within a few months. They lose flavor, lose their bright color, and turn darker during storage…. Though most jellied products should keep for at least a year, their flavor and quality begins to decrease with a few months.” [ref]Andress, Elizabeth L. and Judy A. Harrison. So Easy to Preserve. University of Georgia Cooperative Extension. Bulletin 989. Sixth Edition. 2014. Page 201 to 202[/ref]
Note that this refers to top quality only, not safety. Home canned jellies are safe indefinitely if they are made from a tested recipe, have been properly processed and the seal holds.
Once a home canned jelly is opened, store in the refrigerators. Traditional sugar-laden ones will have a longish storage time in the fridge; low-sugar or sugar-free jellies should be used up within a few weeks or mould will set in despite the refrigeration.
Do jars of jelly need to be processed
Yes. All jars of home canned goods need to be processed, regardless of what is in them.
Most home canned goods are processed for 10 minutes or far longer, and consequently their jars do not need to be sterilized, as the processing time will take care of that.
Jellies, however, usually have shorter processing times and there is concern that for jellies with no added pectin, extending the processing times to 10 minutes could break the gel.
So Easy to Preserve says,
All jellied products are processed in a boiling water bath, to prevent mold growth. To process jellied products in a a boiling water bath, pour the boiling product into a hot sterilized canning jar, leaving ¼ inch headspace. Wipe the jar rim and close with a properly pretreated canning lid. Place on a rack in a canner filled with boiling water. The water should cover the jars by at least one inch. Cover the canner. Bring the water back to a boil gently for 5 minutes. The remove the jars to a protected surface and cool, away from drafts. (NOTE: If unsterilized jars are used the product should be processed for 10 minutes. However, since this additional 5 minutes of processing can result in a weak gel, it is best to use sterilized jars.) [ref]Andress, Elizabeth L. and Judy A. Harrison. So Easy to Preserve. University of Georgia Cooperative Extension. Bulletin 989. Sixth Edition. 2014. Page 202.[/ref]
Ball and Bernardin have increased the processing time for all their jellies to 10 minutes to do away with jar sterilization, regardless of whether the jelly recipe in question of theirs calls for added pectin or no.
Under no circumstances should an outdated preserving method such as wax, or “open kettle canning” to be used to try to seal the jar. The risk is mould, which could lower the pH of the product, which would then allow botulism spores to germinate.
So Easy to Preserve prefers doing jellies in quarter-litres (half-pints):
It is best to use half-pint jars, unless a recipe specifies another size. Using larger jars can result in a weak gel, due to residual heat during cooling.” [ref]Ibid., page 201.[/ref]
Jelly in-depth learning resources
So Easy to Preserve (2014) has an excellent section on jellies, page 197 to 215.
The National Center has online information on all aspects of jelly making.
National Center Jelly FAQs (useful miscellaneous pieces of information)