The USDA offers guidelines for a free-wheelin’, homemade soup that we’ve branded “your choice” soup for easy reference. They give you guidelines inside which you can “create your heart out.”
These recipes can be some of the more useful canning recipes in your arsenal, letting you create jars of instant lunches out of odds and ends of produce that needs using up but of which you don’t have enough for a canning run on its own.
The guidelines are some of the more “looser” guidelines that you will come across in home canning. They tell you what you can’t put in, and how long to process. So the cook actually has a lot of creativity within those safety parameters. You can do what you want within the boundaries, and be assured of safety.
Please note that no matter how long you cook a soup in advance in your soup pot, the processing time does not change. The soup will cook during the processing time, so you might as well take some advantage of that – but the processing time is actually meant to be sterilization time of the food product, and all of that time is needed and it cannot be reduced.
To be clear, the “half and half” rule for soup applies only to these “free-wheelin'” guidelines. You will see other soup recipes from reputable sources that don’t follow the “half and half” rule, and that’s fine, because those recipes had processing times developed specifically for that set of ingredients in them. As the USDA is presenting you with a very wide slate of ingredients to pick at random from, they want half-liquid in the jar to ensure total, maximum heat flow during canning.
- 1 The recipe
- 2 USDA's "your choice" soup recipe
- 3 Ingredients to liquid ratio
- 4 Ingredients to use in the USDA “free-range” soup
- 5 Ingredients to avoid in the USDA “free-range” soup
- 6 Don’t purée
- 7 How to cheat and thicken the soup
- 8 Ingredient preparation
- 9 Some sample “free-range recipes
- 10 Conflicting advice
- 11 Do people get sick from disregarding tested methods for home canned soup?
- 12 Reference information
- 13 Recipe source
- 14 Cooking with canning
- 15 Historical USDA soup recommendation
- 16 Further reading
The recipe
Jar size choices: Either half-litre (US pint) OR litre (US quart)
Processing method: Pressure canning only
Yield: varies
Headspace: 3 cm (1 inch)
Processing pressure: 10 lbs (69 kPa) weighted gauge, 11 lbs (76 kpa) dial gauge (adjust pressure for your altitude when over 300 metres / 1000 feet.)
Processing time: Half-litres (pints) 60 minutes; litres (quarts) 75 minutes.
What is the shelf life of home canned goods?
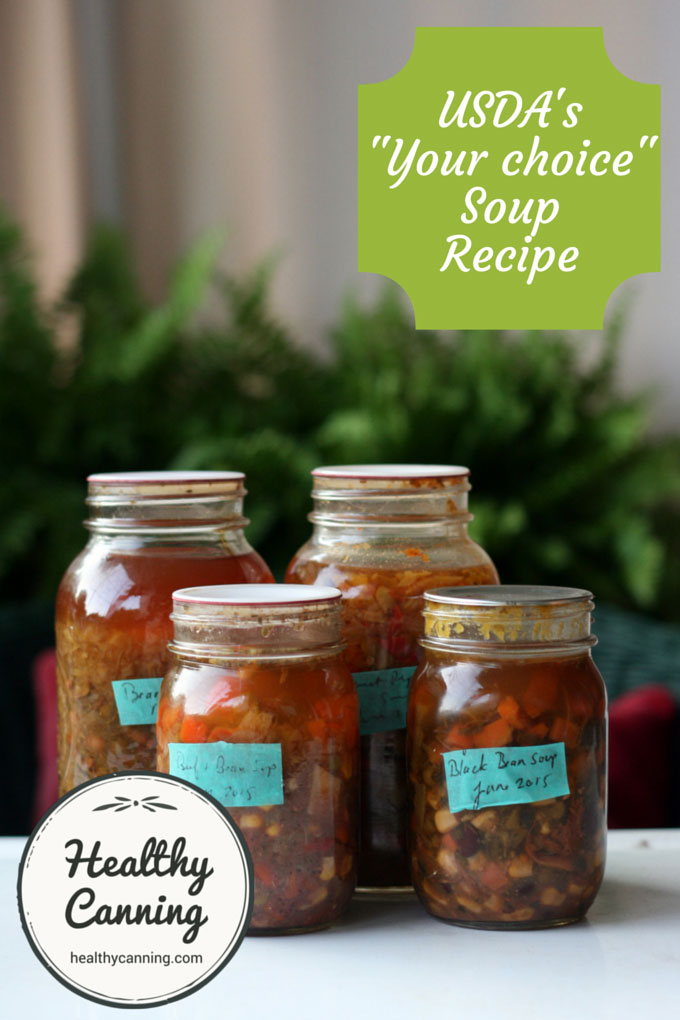
USDA's "your choice" soup recipe
Equipment
- Pressure Canner
Ingredients
Your choice of items for which separate canning instructions already exist
- Vegetables from approved list
- Meat from approved list
- Seasonings of your choice
Instructions
- Cook all meat first;
- Prep and blanch all vegetables first according to USDA canning recommendations for those individual veg, which includes rehydrating dried beans first;
- Combine all the ingredients you propose to use in your soup in a large pot, with enough liquid (stock or water) to cover plus 5 to 10 cm (2 to 3 inches) more. Bring to a boil. Adjust taste with herbs, spices, seasonings, etc.
- There is no need to fully cook the soup, it will cook in the jars -- you are just ensuring everything is piping hot;
- Fill jars half full of solids, no more;
- Top up as need with more broth or stock leaving 3 cm (1 inch) of headspace. If you run out of broth or stock, just use boiling water out of the kettle to top up,. You could even flavour that plain boiling water with stock cubes or powder.
- Pour hot into half-litre (1 US pint) jars or 1 litre (US quart) jars.
- Leave 3 cm (1 inch) headspace.
- Debubble; adjust headspace.
- Put lids on, put in pressure canner.
- Processing pressure: 10 lbs (69 kPa) weighted gauge, 11 lbs (76 kpa) dial gauge (adjust pressure for your altitude when over 300 metres / 1000 feet.)
- Processing time: half-litre (1 US pint) jars for 60 minutes. OR 1 litre (1 US quart) jars for 75 minutes. Processing time for either size jar must be increased to 100 minutes if the soup includes fish or seafood.
Nutrition
USDA “your choice” soup processing table
Guidelines below are for weighted-gauge pressure canner. See also if applicable: Dial-gauge pressures.
| Jar Size | Time | 0 to 300 m (0 - 1000 feet) pressure | Above 300 m (1000 ft) pressure | |
|---|---|---|---|---|
| ½ litre (1 US pint) | 60 mins | 10 lbs | 15 lb | |
| 1 litre (1 US quart) | 75 mins | 10 lbs | 15 lb |
Note: Processing time for either size jar must be increased to 100 minutes if the soup includes seafood. It’s not clear if they distinguish salt-water fish from seafood, or if they include fish (fresh or salt-water) in that.
Ingredients to liquid ratio
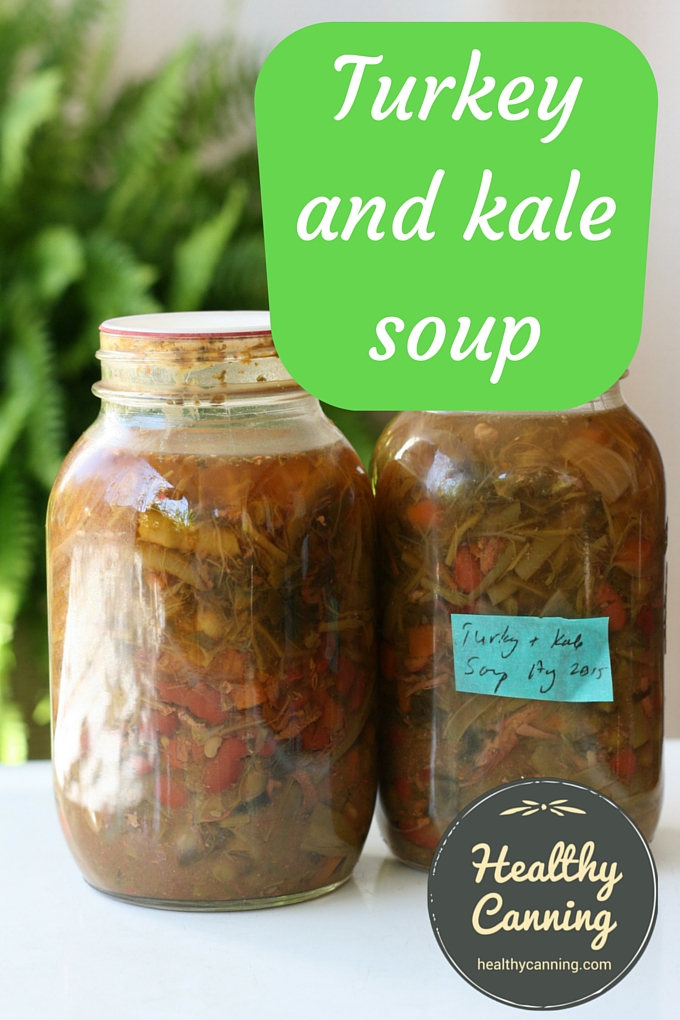
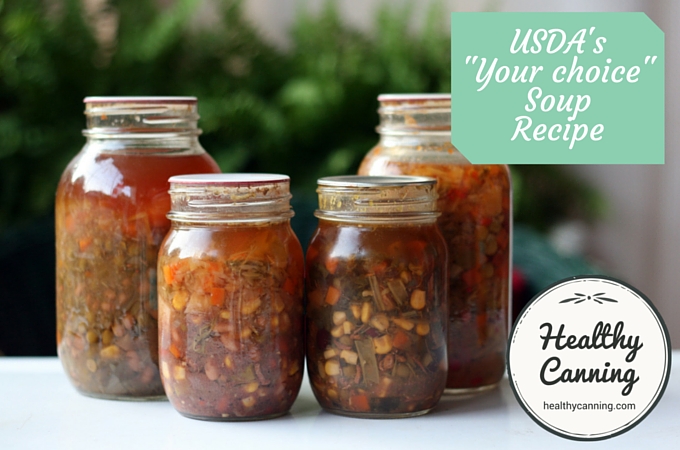
The litre-sized jars of turkey and kale soup (pictured above) were half-solids going into the canner. The carrot, bean, pea, asparagus, etc in it swelled during processing.
The ratio of ingredients must be ½ liquid and ½ small cubed solids.
That basic ratio requirement is designed to ensure that there is enough non-viscous liquid in the jar to circulate around everything and distribute heat evenly during processing.
Some people think that means they are going to end up with a bowl of soup that is half water. They are forgetting that many ingredients will swell during pressure canning, such as corn and peas, and that dried beans will take in a lot of that liquid. So at the end of the pressure canning process, the visual result is often more ¾ solids, ¼ liquid owing to liquid absorption by the ingredients.
That’s probably precisely why the USDA wants that “one-half” safety margin going into this.
So don’t worry, you are not going to be accused of being “cheap” and trying to serve people “water soup” : the soup will be plenty dense after canning!
Ingredients to use in the USDA “free-range” soup
What can you use? You may use any amount of any ingredient for which there are already tested canning recommendation. The NCHFP clarifies: “These directions are intended for use with ingredients that already have separate canning recommendations for those foods.” [1] National Center for Home Food Preservation. Soups. Accessed July 2015.
The USDA has entire produce-aisles full of recommendations for items to home can, so that gives you an embarras du choix of ingredients to work with.
Onion in the USDA soup
Even though the USDA doesn’t have a recommendation for onions, the University of Georgia does, so you can use onion provided you follow the recommendation which is: use baby onions 2 to 3 cm max in size (1 inch), wash, peel, blanch for 5 minutes, then you can use it in the soup. You may also cut up or dice this blanched onion as part of the free-range soup ingredients. [2] Elizabeth Andress to Randal Oulton. Email. 30 July 2015. Email on file.
Ingredients to avoid in the USDA “free-range” soup
Following are the few things you can’t use as ingredients in the USDA’s soup recipe.
Naturally, human inclination is to focus on the handful of things we can’t have, rather than the tractor-trailer loads of things we can have — but the “can’ts” really aren’t that many:
- No flour, cornstarch or other thickening agents including Clearjel. Penn State says, “Adding flour or other thickening agents to a product for home canning, prevents the heat from penetrating to the center of the jar interfering with safe processing.” [3] Making Soup Safely. Blog Entry. Penn State Extension. 22 October 2012. Accessed March 2015.
- No dairy ingredients such as butter, cheese, cream, or milk. They aren’t safe to can, and many people who try anyway adding them to soups report the lids blowing off their jars not too long after as the dairy goes bad in the jars. The NCHFP says on its blog, “[no] cream, milk or other thickening or dairy ingredients.” [4] Christian, Kacey. Simply Soup. NCHFP blog entry. 5 March 2015. Accessed March 2015.
- No starchy products other than beans or chunks of potatoes. That means no pasta, no noodle, no rice — as they will give off starch to thicken the soup affecting heat penetration. Penn State says, “Products high in starch also interfere with heat processing. Thus, add noodles or any type of pasta, rice, or dumplings to canned soups or stews at serving time. Avoid using noodles, alphabet noodles, spaghetti, or other pasta, rice, barley, etc to canned soups.” [5] Making Soup Safely. Blog Entry. Penn State Extension. 22 October 2012. Accessed March 2015.
- Ingredients for which there is no separate canning recommendation. That includes broccoli, cabbage, cauliflower, celery, eggplant, kelp, eggplant, tofu, etc. “Each vegetable should be selected, washed, prepared and cooked as you would for canning a ‘hot pack’ according to USDA directions”, which means that there must be a canning recommendation for each added ingredient. As examples, for this reason we cannot recommend adding cabbage nor cured meats like cured ham to canned soup.” [6] Christian, Kacey. Simply Soup. NCHFP blog entry. 5 March 2015. Accessed March 2015.
If there’s an ingredient that you really strongly feel you should be added to the all-clear list, then perhaps see if you can start a group-funding drive on the Internet to raise research funding for the NCHFP to research it!
Celery note: The University of Alaska Extension service has released some soup recipes based on the USDA’s soup guidelines which do have celery in them. See: Sarah Lewis, Family and Community Development Faculty. Canning Soups and Sauces. UAF Cooperative Extension, Juneau District. November 2014.
Don’t purée
The USDA’s “Your Choice” directions guarantee safety on the assumption that you are dealing with chunks of food allowing heated water to pass freely between them. Puréeing the ingredients would cancel out this guarantee. Puréeing vegetables voids their normal tested processing times, because you’ve changed the density and made it thicker, so there are no known processing times for that vegetable in that form.
To make puréed soups, simply put the ingredients in the jar cubed, can it that way, and when you go to use it and heat it up, just open the jar and whiz the contents in a blender then heat. In this way, you are still getting the convenience of an almost-instant homemade creamed soup.
Granted “puréeing at time of use” works only for soups consumed at home, and is not really practicable for soup in jars taken as work lunches. But there are tested recipes for puréed pea soup, and carrot soup, provided by Ball and Bernardin.
How to cheat and thicken the soup
Thickening tip: if you like okra, considering adding some to your soup. Okra when cooked is mucilaginous, and will help lend a thick mouth-feel to your soups. And, it’s solidly on the list of ingredients you may use!
- For heartiness, you can use beans, and chunks of potatoes;
- For giving body to the broth, you can add okra or cubes of winter squash such as butternut (but NOT summer squash or zucchini);
For a fuller discussion of ways to “cheat” and safely “thicken” the soup, safely, see: How to thicken your home-canned soups.
Ingredient preparation
Any meat should be cooked first until tender (you can sear chunks of beef, pork, lamb, etc first for flavour and colour if you like but do not dredge the meat in flour.) Remove all bones from the meat before using in the soup. Meat should be in small cubes (it’s not defined exactly how small.)
All root vegetables must be peeled, to reduce bacterial load. All vegetables should be blanched first, as you would for a hot pack canning with them. The NCHFP says, “Each vegetable should be selected, washed, prepared and cooked as you would for canning a ‘hot pack’ according to USDA directions.” [7] Burning Issue: Canning Homemade Soups. National Center for Home Food Preservation. 27 March 2013. Accessed March 2015.
Exception for dried beans
Summary: The full canning prep for canning dried beans would normally be rehydration, then a 30 minute boil. But for the soup, you don’t do the 30 minute boil.
Any dried beans or dried peas must be fully rehydrated first otherwise they will absorb the water in the jar and severely affect heat penetration.
To quick rehydrate beans: put in a pot 1 part beans to 3 parts water. Bring to a boil, let boil for 2 minutes, remove from heat, let stand for an hour. Bring back to a boil, then drain. They are now ready to add to your soup mixture for canning. You don’t then boil them for 30 minutes, as you would for canning on their own.
The USDA says, ” For each cup of dried beans or peas, add 3 cups of water, boil 2 minutes, remove from heat, soak 1 hour, and heat to boil; drain.” [8]United States Department of Agriculture (USDA). Complete guide to home canning. Agriculture information bulletin No. 539. 2015. Page 4-18. That’s it for the soup mixture.
So, for these soup directions, just rehydrate dried beans according to USDA instructions, and skip the 30 minute boil after that. They will be cooked plenty during the processing in the jar half full of liquid.
Some sample “free-range recipes
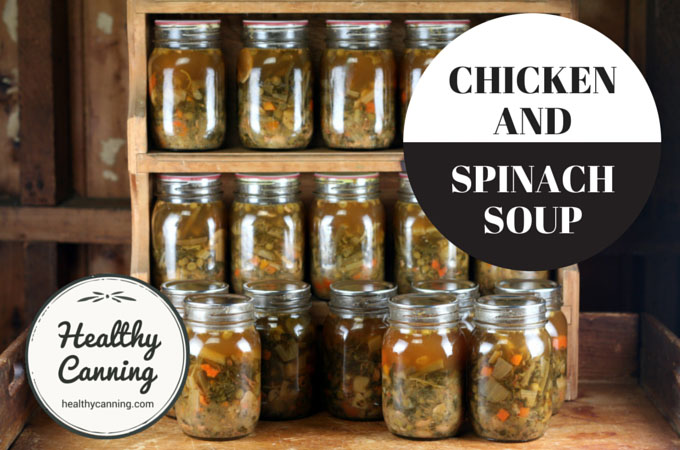
If you’re unsure of how to start making up a soup from scratch, while following the guidelines, Sarah Lewis at the University of Alaska has come up with three great sample recipes following the USDA’s “your choice” guidelines [9] University of Alaska. Lewis, Sarah. Canning Soups and Sauces. UAF Cooperative Extension, Juneau District. November 2014. Accessed July 2015. :
- Classic Chicken Soup;
- Venison (or Beef) Stew;
- Chowder Base.
You can access the recipes in a free PDF at the UAF Cooperative Extension site.
Conflicting advice
Even some of the “safe canning police” people allow themselves, it appears, the following exception to the rules: while the USDA rule is 60 minutes per ½ litre (US pint) and 75 minutes per litre (US quart) with jars half full of solids, they say that you can go over half if you switch to meat processing times: 75 minutes per ½ litre (US pint) and 90 minutes per litre (US quart).
When we asked these people their source authorizing this practice, we were told “Accepted practice.”
Then, there is this advice from Penn State:
Vegetable soups in a broth base may be safely canned using the process time for the ingredients that takes the longest process time for the individual ingredients in the soup. Most soups will take 60 to 90 minutes to process in a pressure canner depending upon size (pints or quarts) and ingredients.” [10] safe canning police. Blog Entry. Penn State Extension. 22 October 2012. Accessed March 2015.
One possible issue with venturing outside the USDA “your choice” guidelines has been raised in an Internet discussion forum on pressure-canned soups: “The old-timers would approach a recipe like yours by canning the mixture using the longest processing time for the ingredients in your list. But that strategy doesn’t address the density issue.” [11] Garden web discussion. Pressure Canning Soup — Am I reading this right? 22 August 2006. Accessed July 2015.
If you are interested in this ‘longest-time-ingredient’ approach, you may be best advised to send a query to the National Center for Home Food Preservation asking their thoughts on the matter before acting on the advice.
Do people get sick from disregarding tested methods for home canned soup?
People do get sick from disregarding professional advice on home canned soup. The University of Florida Extension provides these American figures for 5 years from 2008 to 2013 [12] Keith R. Schneider, Rachael Silverberg, Alexandra Chang, and Renée M. Goodrich Schneider. Preventing Foodborne Illness: Clostridium botulinum. University of Florida IFAS Extension. Publication #FSHN0406. 2004, revised December 2014. Accessed July 2015. :
- 2008. West Virginia, home canned sausage soup (1 deceased from botulism)
- 2009. California, home canned soup. (1 case of botulism)
- 2011. California, home canned soup. (1 case of botulism)
- 2011. California, home canned potato soup. (1 case of botulism)
- 2011. Georgia, home canned potato soup. (1 case of botulism)
- 2012. New Jersey, home canned soup. (1 case of botulism)
Reference information
How to pressure can.
When pressure canning, you must adjust the pressure for your altitude.
What is the shelf life of home canned goods?
Recipe source
The “your choice” guidelines are entitled just “Soups”, and are found in: United States Department of Agriculture (USDA). Complete guide to home canning. Agriculture information bulletin No. 539. 2015. Page 4-18.
Cooking with canning
Feel like dumplings? You can quickly add soup dumplings to your home-canned soup when you go to open a jar, if you’ve got some of this DIY Biscuit Mix on hand.
Heat the home-canned soup to a gentle boil first in a saucepan before adding the dumplings, then simmer covered for 15 minutes.
(To be clear: for taste, texture and safety reasons, you would not want to home-can soup with dumplings already in it.)
Historical USDA soup recommendation
Here is the USDA advice from 1947. Do not follow this now; this is for academic information only to show how the advice has changed.

Tanner, F.W. and Grace B. Armstrong. Canning Fruits and Vegetables. Circular 614. Urbana, Illinois: University of Illinois Extension Service. June 1947.
Notice that even in the 1940s they required pressure canning for the soups.
Note as well the similarity with the Penn State advice above for the “longest ingredient.”
Further reading
Burning Issue: Canning Homemade Soups. National Center for Home Food Preservation. 27 March 2013.
If you haven’t stored your pressure canner for the season. Blog post by National Center for Home Food Preservation. 23 January 2013.
Making Soup Safely. Blog Entry. Penn State Extension. 22 October 2012.
Soups. National Center for Home Food Preservation. November 2015.
References


Kelly R
In your advice on how to thicken your soup safely, on the ‘your choice’ soup page you mention:
“For giving body to the broth, you can add okra or cubes of winter squash such as butternut (but NOT summer squash or zucchini)”
And the USDA also has separate advice for canning cubes of pumpkins and winter squash. I have also seen several recipes from ‘reputable’ sources using the Your Choice base recipe which include cubes of pumpkin or winter squash.
But then Penn state and Alaska come in and ruin it for us, saying:
“Avoid canning pumpkin, winter squash, broccoli, or cauliflower soup. These pack together and contain ingredients that interfere with safe processing. There are no scientifically research tested recipes for these soups. ” *
So who are we to believe? I very much want Penn and Alaska to be wrong, but I also don’t want to die.
* https://extension.psu.edu/preserving-soup-safely
Sarah Lewis, Canning Soups and Sauces, UAF Cooperative Extension, Juneau District, November, 2014. https://www.healthycanning.com/wp-content/uploads/2014-Alaska-Class-Handout-Soups-Sauces.pdf
Lilly
Hi. Thanks for codifying this great information. Question: if I use canned clam broth in my soup (without no fish or seafood whatsoever either in the broth or added by me) would I then have to process for the extended time? Thank you!
Melisa Dumas
Is it possible to add store bought canned tomatoes to my other vegetables when canning this soup?
Healthy Canning
You could add home-canned tomatoes, and thus you could also add store-bought canned tomatoes.
DavetteB
Trying to make sure I understand what I’ve read:
You are prepping ingredients for soup individually and assembling in the jars, not actually making a pot of soup and canning it ready-made, correct?
I have a recipe for chicken, kale, and sweet potato stew, using canned sweet potatoes; other than not coating the chicken chunks in flour before sauteeing, it seems as if it would work (just broth and seasonings and a little oil trace from browning the meat).
Is blanching needed if using frozen or canned (store bought) veggies?
Hillevi
Hi!
Thanks for a really good and informative website! Just to make sure I understood the onion part in this recipe right though – are baby onions required even if you want diced onions or could you then use “regular” onions instead? Not living in the US and feeling unsure of wether baby onions are a special kind of onion or just a small version of a regular onion 🙂
Amy Herrera
Ball’s Complete Book of Home Preserving has a recipe for chicken soup using regular chopped onion and chopped celery.
Healthy Canning
Correct, small versions of regular onions.
Adrienne Herman
I need to know the cooking time in a regular canner NOT a pressure cooker canner for Layered Chicken Soup
Healthy Canning
We only work with tested recipes from reputable sources.
Cresta
You CANNOT SAFELY CAN chicken soup in a water bath canner. Period. Vegetables and meat are required to be canned in a pressure canner. If you don’t have one, you can freeze your chicken soup. Hope that helps! Stay safe! 🙂
Katie Anne Gaither
You CANNOT safely can soup in a regular water bath canner. It is VERY DANGEROUS. It doesn’t matter if you can them for an hour or 20 hours, the temperature will never get high enough to kill off botulism. They MUST be pressure canned.
Jodie
It is not safe to can layered chicken soup in a regular water bath canner. You must use a pressure canner.
John
Chicken Soup MUST be pressure canned or it is not safe — that is the ONLY way to reach temperatures that will kill botulism spores. I pressure can, but more often than not I end up freezing soup just to be safe. You can put in in Food Saver bags (admittedly, it’s a pain to get the air evacuated just right without sucking soup out, but practice makes perfect) and then you have a boil-in-bag soup ready in about 10 minutes out of the freezer.
Never cut corners when it comes to canning — you don’t want to be one of those lonely statistics.
Shelia
You can’t can chicken in a water bath canner. Meat must be pressure canned.
Pam
You cannot safely can soup in a regular canner. It must be pressure canned, and you must follow USDA approved/tested recipes to be safe.
Katherine Kurch
It is not safe to water bath can chicken, or soups. They need to be pressure canned.
Julie
Hi, I haven’t been able to find anyone to answer my question. When doing a veggie soup with the acceptable list of veggies (filling to half): Do I need to add the additional acid if tomatoes are included? Thank you 🙂
Healthy Canning
If acidification were required, they would have specified, for sure. This is all being pressure canned for a very long time, long enough to kill any botulism spores lurking in meat even, so the processing time and heat would handle the tomatoes, too.
Pam
I noticed twice that beans and potatoes are listed for acceptable starches. What about corn?
Healthy Canning
You’re right, corn would also provide a bit of starch as well….
Barbara
I don’t see any bell peppers in the chicken soup recipe. Is there a reason? I see them included in recipes that contain tomatoes. Is that the difference? Thank you.
Healthy Canning
The USDA’s “your choice” soup guidelines would absolutely allow peppers because it is a vegetable they already have canning guidelines for. One consideration though might be the pepper skins, though the USDA method has you peel the peppers first (the Ball and Bernardin method does not.)
Diana
Can lentil soup be canned safely> The ingredients are chicken stock, lentils, diced carrots, onions and garlic–along with several dried spices.
My only hesitation is the consistency–it’s about the consistency of split pea soup.
Thanks!
Healthy Canning
There are no tested, safe recipes for that. There is however a split pea recipe, why not try that?
Ethel cain
Can you pressure can hazelnut soup. No dairy, only leeks and parsnips and vegetable broth. The soup will have ground toasted hazelnuts and pumpkin seeds
Healthy Canning
There are no tested recipes or procedures for this. Freezing is a good choice.
Andrew
I like to use carrot juice as the “water” to my soups is this ok?
Healthy Canning
Hi Andrew, ask one of these Master Food Preserver groups what they feel.
Cathy Walz
Why is it so important to blanch vegetables before adding to the soup? I did not blanch my green beans before I added them to my soup mix. Is that going to be a risk of contamination to my soup?
Healthy Canning
Please check with one of these Master Food Preserver help groups.
Ellie
Thanks so much for sharing this. I was also interested in seeing the recipes you mentioned that Sarah from the University of Alaska put together, but it looks like they’re not links. Do you happen to have a link to those recipes?
Roxanne Eberle
Here you go:
https://www.healthycanning.com/wp-content/uploads/2014-Alaska-Class-Handout-Soups-Sauces.pdf
Ellie Holden
Thank you!
Angela Willis
Can I cook my soup with a smoked ham bone or fastback before canning?
Healthy Canning
Those would count as just being flavouring, so yes. If your piece of fat back adds excess fat on the top of the soup mixture, then you’d want to skim that off to make sure the fat doesn’t interfere with getting a seal. Don’t overcook the soup ingredients before canning: remember that the heat of the canning process will do some “cooking” of its own as well.
Dawn
I have recipe for crab chowder. I use Imitation crab how long would I process that 60 min for Pints and 75 for Quarts. Its not real seafood so would I do it for the 100 min. I do add heavy cream but I can add that at the time we open the jars which would keep it safe.
Main ingredient.
Imitation Crab
Potatoes
Corn
bacon bits
chicken broth
Pepper
Italian herbs
Healthy Canning
The imitation crab is fish, often something such as pollock. Use the USDA’s longer seafood soup processing times for that soup and be sure to follow guidelines such as half solids, etc. For sure, at time of serving add the cream (SOS mix might also be interesting. https://www.healthycanning.com/soup-sauce-sos-mix/)
They wouldn’t be happy about the bacon bits, as there’s a prohibition against cured meats. https://www.healthycanning.com/home-canning-cured-meats-bacon-brined-corned-ham-etc/ Could they be sprinkled on at time of serving?
Linda Thomas
Aren’t some/all commercial bacon bits a soy product, not actual bacon. If so, how would that affect a soup like this?
Healthy Canning
Some are actually bean product for sure, and beans are allowed. But, that being said, that’s a good “trap / gotcha” question that, whatever way I answered it, I would get criticized, so I’m not gonna touch it :} I’d suggest asking your local extension service, or, if you’re not sure what that is or if you have one, ask a Master Food Preserver group such as this one: https://www.facebook.com/UCCE-Master-Food-Preservers-of-El-Dorado-County-456649991034665/
Melissa D
I love that I can take my favorite soups & can them up!
I do worry about canning leftovers. I use beans in most of my soups. When canning leftovers right after dinner, I noticed that my soups end up disintegrating since they are essentially double processed. I usually use my Instant Pot for soups (628 ft elev. using 11 lbs of pressure on manual for 10 minutes.) Since the beans & vegetables disintegrate, would that require a longer processing time? I always add more stock to the jars if the soup is over 50% solids to try to make it 50% liquids. Now I am concerned.
Vicksky
I am so sad that I cannot safely can broccoli cheese soup. Freezer appears to be the only way. Or make pickled broccoli! Hmmmm….
Healthy Canning
Yep, pickled or frozen. You can steam blanch the broccoli (5 minutes blanch time, according to NCHFP) to really speed up the prep for freezing versus blanching in water — with steam blanching there is no 20 minute wait for the water to come back to the boil after you put the broccoli into the water.
If you look at the very long list of things you can can, you will feel tired enough as it is seeing what you have to work through to experience. At the end, you can see if you have any leftover energy to dream about things you can’t can :}
Lana
Thank you for this in depth look at the different rules and thoughts behind them