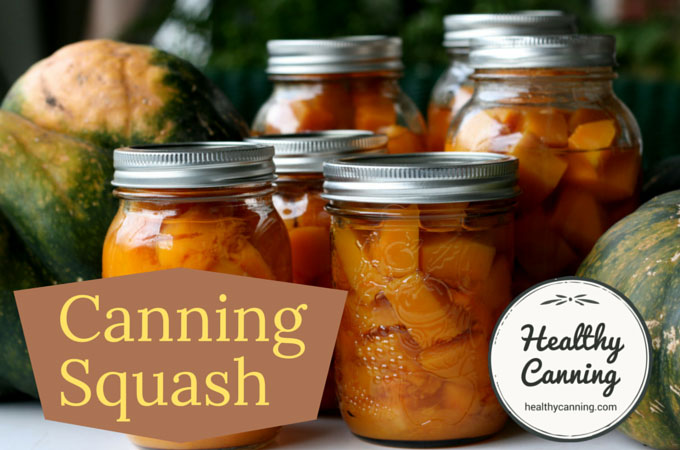
Plain pumpkin and winter squash can be canned. They are great for quick pies and quick tasty side dishes of squash mash. And, depending on what you add to them of course, they can be a dieter’s dream: both pumpkin and winter squash are even free vegetables on Weight Watchers.
This article is about the hard-shelled winter squash. Pumpkin is a winter squash. (For information on the difference between summer squash and winter squash, see this article on squash.) See separate information on canning summer squash.
If you buy your squash in the fall when there’s a glut of it at the stores, you can enjoy squash year round at a fraction of the price that everyone else is paying. You must use a pressure-canner for this (there is no safe way to water-bath plain squash, unless you pickle it), but your investment quickly pays off.
- 1 Quantities of squash needed
- 2 The recipe
- 3 Home-canning squash and pumpkin
- 4 Reference information
- 5 Nutrition
- 6 Don’t waste the seeds!
- 7 Background overview
- 8 Pumpkin and Winter Squash canning don’ts
- 9 Wash well before peeling
- 10 Good winter squash for home canning
- 11 Prep tip
- 12 Pickling Pumpkin and Squash
- 13 Canning summer squash
- 14 Cooking with canning recipes
- 15 History
- 16 Source
Quantities of squash needed
Numbers are approximate guidelines.
On average, as a very rough guideline, expect to need about 1 kg (2 ¼ lbs) of fresh, unpeeled squash per 1 litre (US quart) jar of canned squash.
- 7 kg (16 lb) of squash = 7 litres (US quarts) canned squash
- 4.5 kg (10 lbs ) of squash = 9 x ½ litres (US pints) canned squash
A drained litre (US quart) jar will hold 750 g (1.6 lbs) 0f blanched squash cubes.
A drained ½ litre (US pint) jar will hold 350 g (12 oz) of blanched squash cubes.
The recipe
Jar size choices: Either half-litre (1 US pint) OR 1 litre (1 US quart)
Processing method: Pressure canning only
Yield: varies
Headspace: 3 cm (1 inch)
Processing time: Half-litres (pints) 55 minutes; litres (quarts) 90 minutes.
Processing pressure: 10 lbs (69 kPa) weighted gauge, 11 lbs (76 kpa) dial gauge (adjust pressure for your altitude when over 300 metres / 1000 feet.)
Home-canning squash and pumpkin
Ingredients
- winter squash (or pumpkin)
Instructions
- Wash, peel and seed the squash.
- Cut into 3 cm (1 inch) cubes.
- Blanch the squash cubes 2 minutes in boiling water.
- Pack into half-litre (US pint) jars or 1 litre (US quart) jars.
- Leave 3 cm (1 inch) headspace.
- Top up with clean boiling water (such as from a kettle, for instance), maintaining headspace.
- Debubble, adjust headspace.
- Wipe jar rims.
- Put lids on.
- Processing pressure: 10 lbs (69 kPa) weighted gauge, 11 lbs (76 kpa) dial gauge (adjust pressure for your altitude when over 300 metres / 1000 feet.)
- Processing time: half-litre (US pint) jars for 55 minutes OR 1 litre (US quart) jars for 90 minutes.
Notes
Nutrition
Processing guidelines below are for weighted-gauge pressure canner. See also if applicable: Dial-gauge pressures.
| Jar Size | Time | 0 to 300 m (0 - 1000 feet) pressure | Above 300 m (1000 ft) pressure | |
|---|---|---|---|---|
| ½ litre (1 US pint) | 55 mins | 10 lbs | 15 lbs | |
| 1 litre (1 US quart) | 90 mins | 10 lbs | 15 lbs |
Reference information
How to pressure can.
When pressure canning, you must adjust the pressure for your altitude.
More information about Salt-Free Canning in general.
Nutrition
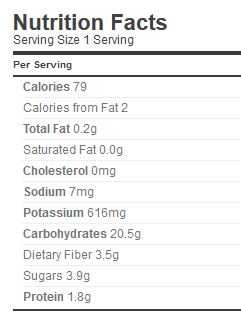
Serving size: 175 g, drained (about one-half of a half-litre / US pint jar, presuming the average jar contains a yield of 350 g solids.)
Per 175 g: 78 calories, 7 mg sodium
Weight Watchers PointsPlus®: 175 g = 0 points (squash is free on Weight Watchers).
* Nutrition info provided by https://caloriecount.about.com
* PointsPlus™ calculated by healthycanning.com. Not endorsed by Weight Watchers® International, Inc, which is the owner of the PointsPlus® registered trademark.
Don’t waste the seeds!
You can “double dip” and get an extra bonus product out of your work besides canned squash — namely, roasted squash seeds.
Roasted squash seeds are very good eating.
To make them: wash the seeds. You don’t need to get all the little bits of squash off the seed — in fact, they are tastier with the little pieces of squash on them.
Toss in a bit of oil of your choice, and roast in a slow oven 125 C (250 F) for 10 to 15 minutes, tossing with a spatula half-way through.
Store in sealed container in the fridge. Good for a few weeks. (Or, freeze.)
You can season as desired with a nice salt substitute, some parmesan cheese, some chili powder, etc.
Background overview
To can pumpkin or winter squash, you have to peel and seed them, cube, blanch lightly, then pack in jars and pressure can (never water bath.) Penn State Extension says,
… cut the peeled product into 1 inch (3 cm) cubes and add them to boiling water; cook them for 2 minutes and then pack the hot cubes into hot jars; fill the jars with boiling hot cooking liquid. Allow 1 inch (3 cm) headspace. Process at 11 pounds pressure in a dial gauge pressure canner or 10 pounds pressure in a weighted gauge pressure canner. Process pints (½ litres) for 55 minutes and quarts (1 litres) for 90 minutes.” [1] Penn State Extension. Pumpkin and Winter Squash. October 15 2012. Accessed January 2015.
The cubes allow water and heat to flow evenly through the jar to ensure that no cold spots remain unsterilized. Mash after opening and draining.
Knowing that, you won’t be surprised that the most popular variety for canning is butternut squash, specifically winter squash, as it doesn’t have the ridges that most other squashes do and is really easy to peel. It also has a small seed cavity that is easy to clean.
You can can any variety of winter squash, though, if you’re willing to put the peeling work into it!
Pumpkin and Winter Squash canning don’ts
No mashing
Don’t try to home can pumpkin or winter squash mashed or puréed, it’s not safe.
Just about everyone going into this for the first time goes: wait, can’t I just bake the squash, scrape it off the skin, and then can the squash flesh that way? It would be so much easier….
You cannot, because it has been proven in labs that there are very real density issues with mashed squash (or squished squash) that prevent the required heat distribution to fully penetrate throughout the jars in home canning.
The cubes allow water and heat to flow more evenly through the jar.
Penn State Extension says,
Do not can mashed or pureed pumpkin because the purée is too dense for adequate heat to penetrate to the center of the jar during processing.” [2] Ibid.
But go ahead and mash it all you like when you open the jar! Just drain the water off first (tip! freeze that drained-off water for wonderful soup stock.)
If you want to store it mashed, you must freeze it.
No canning of spaghetti squash
Note that spaghetti squash is explicitly recommended against as the exception: all other winter squashes are fine to can.
Penn State Extension says,
The University of Georgia Extension Service goes into more detail about why:
“DO NOT CAN spaghetti squash. Its flesh does not stay cubed during processing. Spaghetti squash can be frozen.” [4]Andress, Elizabeth and Judy Harrison. Preserving Food: Canning vegetables. University of Georgia. March 2013. FDNS-E-43-3. Page 6.
The issue is density. The spaghetti squash would break down into a compacted mass, preventing full heat penetration to kill any botulism spores present.
Even if canning were possible, the resulting quality would be unacceptable. Strands of spaghetti squash need to be at least slightly “al dente” to be usable as “spaghetti”, and if reduced to a fibrous moosh, most people would find the texture after canning unpalatable.
Wash well before peeling
Penn State Extension says that the rinds of pumpkin and winter squash potentially have a lot of surface bacteria and other spoilage organisms:
It is necessary to wash them thoroughly before taking a knife through the skin which could force surface bacteria down into the flesh. Scrub them with a vegetable brush under cool running water before cutting and cooking. Do not use soap or detergent.” [5] Ibid.
Good winter squash for home canning
It’s unfortunate, admittedly, that winter squash has to be peeled and cubed before canning. Being able to roast or pressure can a squash, then just scrape the soft flesh off the skin and into jars certainly would be a lot less work than peeling raw squash.
But given that that’s the reality, it’s no small wonder that so many home canners prefer working with butternut squash (or even better, one of the straighter variants such as Waltham butternut squash.) It’s pretty much the easiest winter squash to peel owing to having the fewest ridges. Squash such as acorn squash is a beast to peel. It’s almost better to roast that, scrape off the flesh, and freeze in tubs.
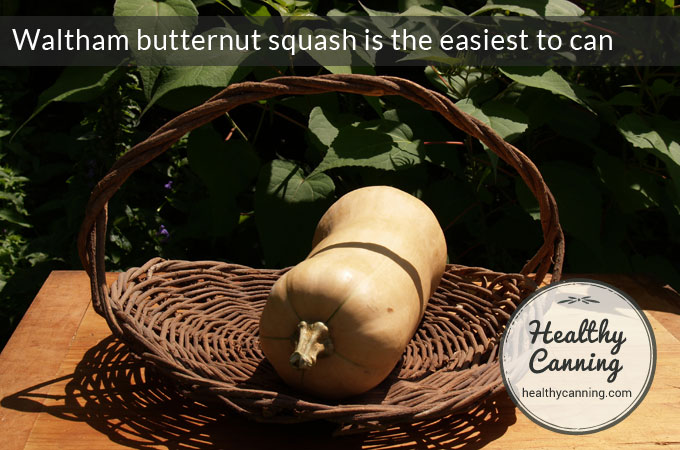
Waltham butternut squash is possibly the easiest squash to peel when raw.
Prep tip
If you are canning great quantities of plain squash, it can be onerous to try to peel, chop and process all in one day, especially given the long 90 minute processing times for the litre / US quart jars.
You may wish to consider on one day doing the peeling and chopping, then storing your raw squash cubes in the fridge overnight in sealed bags. The next day, take out of the fridge about an hour before starting to let them warm up to room temperature, then proceed with the blanching.
It makes for a less grueling session.
Pickling Pumpkin and Squash
The National Center for Home Food Preservation says that, in their arsenal of canning recipes, they don’t have any recommendations for canning pickled pumpkin or winter squash:
Pickling Pumpkin: Pumpkin can be used in pickled recipes such as salsas, chutneys, and relishes; however, your recipes for these must be treated as fresh prepared foods and kept refrigerated. We do not have tested recipes and procedures to recommend for safely canning these types of products by either the boiling water or pressure canning method.” [6] Andress, E.L. Home Preserving Pumpkins. Athens, GA: The University of Georgia, Cooperative Extension Service. 2010. Accessed July 2015.
Other reputable sources, however, do have some recipes for pickling winter squash, and pumpkin.
Jarden
Pumpkin Pineapple Autumn Glory Compote (Bernardin)
Squash Pickles (Ball Blue Book. Recipe online here at Field and Stream )
Linda Ziedrich
Crisp Pickled Pumpkin or Squash (Joy of Pickling, 2009. Page 116)
Sweet Pickled Pumpkin or Squash (Joy of Pickling, 2009. Page 242)
Canning summer squash
To be clear, these procedures do not apply to summer squash (such as zucchini.)
For information on canning summer squash, see Canning Summer Squash.
Cooking with canning recipes
Pork Pie with Sweet Potato Crust
History
The first recommendation about squash was actually not to can it at all, but rather to keep it in a root cellar: “It was recommended that beets, carrots, mature lima beans, pumpkin and squash should not be canned since root vegetables could be stored satisfactorily and drying was possible for lima beans and okra.” [7] Andress, Elizabeth L and Gerald Kuhn. Critical Review of Home Preservation Literature and Current Research. II. Early History of USDA Home Canning Recommendations. Athens, GA: University of Georgia, Cooperative Extension Service. 1983.
By 1936, you could can it, though they wanted it canned at 15 lb pressure: “In September 1936, Farmers’ Bulletin No. 1762 … was issued…. Some vegetables – greens, pumpkin, squash and cream-style corn – required a 250F (15 psig) processing temperature.” [8] Ibid.
Older canning books contained USDA directions for canning mashed squash and pumpkin. Here are 1947 directions for puréed:

Click to enlarge. From: Tanner, F.W. and Grace B. Armstrong. Canning Fruits and Vegetables. Circular 614. Urbana, Illinois: University of Illinois Extension Service. June 1947.
In 1978, a University of Minnesota team headed by Edmond Zottola re-evaluated that canning recommendation and found it was potentially unsafe:
Another interesting issue studied by Zottola et al (1978) was the safety of canned strained (pureed) squash or pumpkin using current recommendations. Diverse product viscosities from the same recipe yielded a wide range of F0 values. The authors recommended canning cubed pumpkin or squash only since heat penetration data for this product were more uniform than for strained. This issue perhaps requires a decision on a standardized policy regarding recommendation for canning strained pumpkin.” [9] Andress, Elizabeth L and Gerald Kuhn. Critical Review of Home Preservation Literature and Current Research. III. Origins and Assessment of Current USDA Recommendations BHNHE and Related Research. Athens, GA: University of Georgia, Cooperative Extension Service. 1983.
This led to the USDA withdrawing its recommendations for mashed squash and pumpkin and since 1989, the recommendation has been to can in cubes. [10] Andress, Elizabeth. “History, Science and Current Practice in Home Food Preservation.” Webinar. 27 February 2013. Accessed January 2015.
Source
Pumpkins and Winter Squash – Cubed. United States Department of Agriculture (USDA). Complete guide to home canning. Agriculture information bulletin No. 539. 2015. Page 4-18.
References

Liane Ramirez
Thank you answering simple questions like “why blanch and don’t can mash”. These are the type of questions I am asking when reading new and want answered.
Matt
why does the pumpkin need to be blanched before canning? it is going to be pressure canned for 55 to 90 minutes anyway to kill anything in side. wouldn’t blanching it before just make it mushier?
Healthy Canning
The blanching helps to drive some air out which will extend the storage life of the product. Oxygen is the enemy of food storage, as you know. It also raises the temperature of the cubed pumpkin; the canning processing times would have been based on expecting those temperatures going into the jars. It’s not unreasonable to expect that the microbial level of the product going into the jars would have been reduced by the blanching as well.
Lillian M Hansen
How would I use my own canned pumpkins to make a puree after i open the jar? Are there any other ingredients I would need to use?
Healthy Canning
Hi Lilian. I put a sieve over a large 8 cup (2 litre) batter jug. Open the jar(s), dump into sieve, drain for a few seconds. You can press a bit if you want with the back of a spoon. Tip the drained pumpkin into a mixing bowl, and mash with a potato masher, which takes about 15 seconds.
Sometimes you want a drier purée for certain recipes. So I’ll do a quick second step in those cases: after mashing, I put the mashed pumpkin back into the sieve to let it stand there for a minute or two to drain some more while I get on with other things.
At that point, you will have the equivalent of the pure tinned purée that we buy from Libby, etc. Just as with the store-bought, whatever else you add will depend on what recipe you are using it for.
I add the drained-off broth to a tub in the freezer for soup stock later (I never have to pay for salty soup stock cubes!)
Michele Surace
Can I use pumpkins that I bought from the store and we’re outside during the Halloween season to can?